
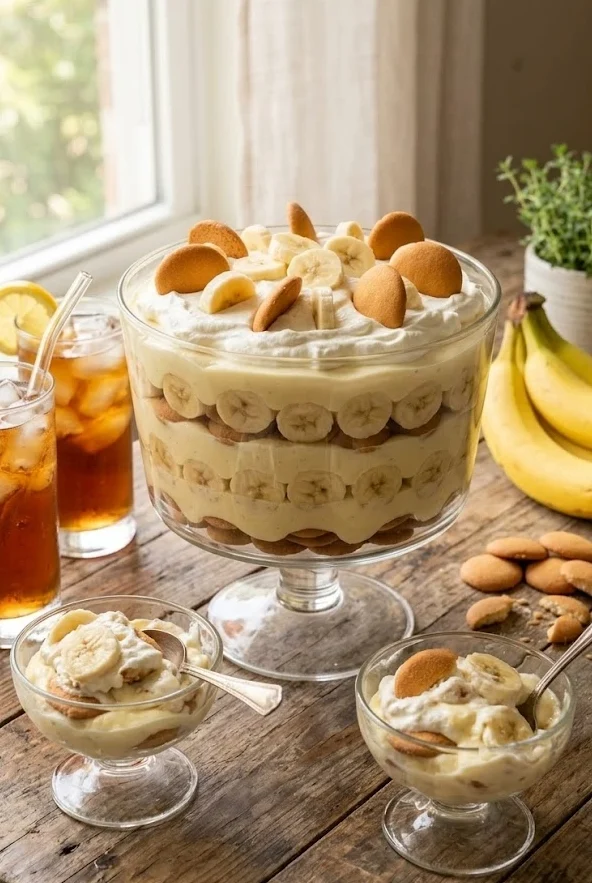
If there is one summer dessert that has the power to silence a crowded backyard party the moment it hits the table, it is a generously layered, ice-cold bowl of homemade banana pudding. This No-Bake Banana Pudding is everything summer desserts should be – effortless to make, deeply satisfying to eat, and the kind of recipe that gets requested by name at every gathering from Memorial Day straight through to Labor Day.
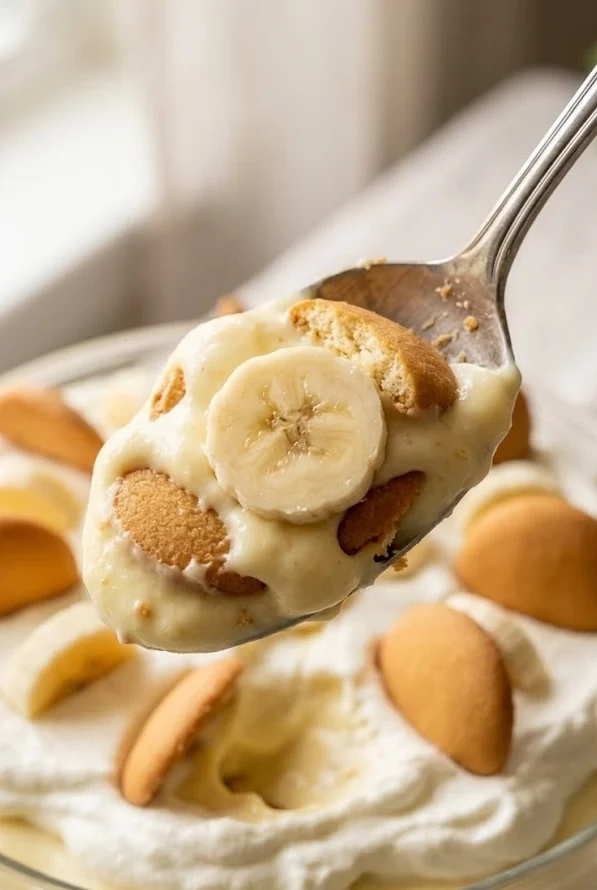
Layers of silky vanilla pudding, ripe fresh bananas, crisp Nilla wafers that soften into something almost cake-like overnight, and a cloud of lightly sweetened whipped cream on top. No oven. No complicated technique. No stress.
This is the summer desserts no bake recipe that belongs in every home cook’s permanent rotation, and once you make it the first time, you will completely understand why it has been a staple of Southern American kitchens and backyard celebrations for generations.
Why You’ll Love This No-Bake Banana Pudding
The first thing people notice is how little effort it takes relative to how impressive it looks and tastes. This is a genuine no-bake recipe in every sense – no stovetop pudding, no tempering eggs, no baking dish that needs to come to temperature. Everything comes together in a large bowl with a hand mixer and a spatula, and the refrigerator does the rest of the work.
What makes it truly exceptional, though, is what happens during the chilling time. As the pudding sets and the wafers soften into the cream, the whole dessert transforms into something greater than the sum of its parts – a unified, custardy, deeply flavorful experience that tastes like it took far more effort than it actually did.
Here is why this recipe is a non-negotiable addition to your summer desserts ideas collection:
- Completely no bake from start to finish
- Ready to assemble in 20 minutes, then the fridge does the work
- Ideal summer desserts for a crowd – scales up effortlessly
- Universally loved by kids and adults, making it perfect summer desserts for kids
- Naturally portioned for individual cups or served family-style in one large trifle dish
- Easily adapted as summer desserts healthy with lighter ingredient swaps
- One of the most reliable summer desserts cold options that actually improves overnight
- Summer desserts with fruit at its most classic and satisfying
Common Mistakes When Making No-Bake Banana Pudding (And How to Avoid Them)
Even the simplest recipes have a handful of pitfalls, and banana pudding is no exception. These are the most common issues and exactly how to avoid every one of them.
Using underripe bananas. This is the single biggest flavor mistake in banana pudding. Bananas that are still firm and pale yellow taste starchy and bland inside the pudding layers. You want bananas that are fully ripe – deep yellow with a few brown spots – which are significantly sweeter, softer, and more flavorful. They also release their banana aroma more fully into the surrounding pudding as everything chills together.
Not whipping the cream cheese long enough. If you are using a cream cheese base for the pudding layer, it needs to be beaten until completely smooth and lump-free before any other ingredient is added. Lumpy cream cheese at this stage means lumpy pudding at the end, and no amount of additional mixing will fully fix it once the other components are incorporated.
Assembling too far in advance with the banana layer on top. Bananas exposed to air oxidize and turn brown relatively quickly, even inside a covered dish. Always make sure the banana slices are sandwiched between layers of pudding and wafers rather than placed on the very top of the dessert, and assemble no more than 24 hours before serving for the freshest appearance.
Using instant pudding without chilling it first. If you add warm or room-temperature pudding to the layers before it has had a chance to set, the whole dessert becomes loose and soupy rather than holding its layers. Mix the pudding and let it firm up in the refrigerator for at least 15 minutes before beginning assembly.
Skipping the overnight chill. This is perhaps the most important step in the entire recipe. One hour of chilling produces a decent banana pudding. Eight hours of chilling produces a transcendent one. The wafers absorb the pudding, the flavors meld completely, and the texture becomes deeply creamy and cohesive in a way that shorter chilling simply cannot replicate.

Key Ingredients for No-Bake Banana Pudding
Each ingredient in this recipe plays a specific and important role, and understanding them helps you make smart decisions and confident substitutions.
Ripe bananas are the heart of this recipe and the ingredient that most directly determines the final flavor. As bananas ripen, their starch converts to sugar, making them sweeter, softer, and more intensely banana-flavored. For summer desserts with fruit that truly tastes like fruit, this step cannot be shortcut.
Nilla wafers are the classic choice and the one most deeply associated with traditional Southern banana pudding. They start crisp and buttery, but after hours in the refrigerator surrounded by pudding cream, they soften into a texture that is remarkably similar to a delicate vanilla sponge cake. Crushed graham crackers or vanilla sandwich cookies work as substitutes, but the original Nilla wafer experience is genuinely worth seeking out.
Cream cheese adds body, tang, and richness to the pudding layer that instant pudding alone cannot provide. It also stabilizes the whipped topping and keeps the pudding layer from becoming watery as it sits, which is essential for summer desserts for a crowd that needs to hold up across a long party.
Instant vanilla pudding mix is the shortcut that makes this a true no-bake recipe. Combined with cold milk and whipped into the cream cheese base, it sets the pudding layer quickly and reliably without any cooking required.
Sweetened condensed milk adds a deep, caramel-like sweetness and a silky richness to the pudding base that makes this version taste noticeably more indulgent than a basic instant pudding preparation. It is the ingredient that makes people ask what you did differently from every other banana pudding they have tried.
Heavy whipping cream whipped to soft peaks gives both the pudding layer and the topping their light, mousse-like texture. For summer desserts healthy adaptations, a good quality whipped coconut cream makes an excellent dairy-free substitute that whips and holds similarly well.
Vanilla extract reinforces the vanilla flavor throughout and adds a warmth that ties the banana, cookie, and cream elements together into a cohesive, rounded flavor profile.
How to Make No-Bake Banana Pudding
Ingredients
For the pudding cream layer:
- 8 oz cream cheese, softened to room temperature
- 1 can (14 oz) sweetened condensed milk
- 1 package (3.4 oz) instant vanilla pudding mix
- 1 cup cold whole milk
- 2 tsp vanilla extract
- 2 cups heavy whipping cream, cold
For assembly:
- 4 to 5 ripe bananas, sliced into rounds approximately 1/4 inch thick
- 1 box (11 oz) Nilla wafers
For the topping:
- 1 cup heavy whipping cream, cold
- 2 tbsp powdered sugar
- 1 tsp vanilla extract
- Nilla wafers and banana slices for garnish
Instructions
- Beat the cream cheese. In a large mixing bowl, beat the softened cream cheese with a hand mixer or stand mixer on medium-high speed for 2 to 3 minutes until completely smooth, fluffy, and free of any lumps.
- Add condensed milk and pudding. Add the sweetened condensed milk, instant vanilla pudding mix, cold whole milk, and vanilla extract to the cream cheese. Beat on medium speed for 2 minutes until fully combined and beginning to thicken.
- Whip the cream. In a separate cold bowl, whip the two cups of heavy cream on high speed until stiff peaks form. This takes approximately 3 to 4 minutes with a hand mixer.
- Fold together. Using a large spatula, gently fold the whipped cream into the pudding mixture in three additions, using slow, sweeping motions to preserve as much volume as possible. The finished pudding cream should be thick, airy, and hold its shape when scooped.
- Chill the pudding cream. Cover the bowl and refrigerate for 15 minutes while you prepare the bananas and gather your serving dish.
- Begin layering. In a large trifle dish, 9×13 baking dish, or individual serving cups, start with a single layer of Nilla wafers covering the entire bottom.
- Add bananas. Arrange a layer of banana slices evenly over the wafers, covering as much surface area as possible.
- Add pudding cream. Spoon or pour approximately one third of the pudding cream over the banana layer and spread gently to the edges.
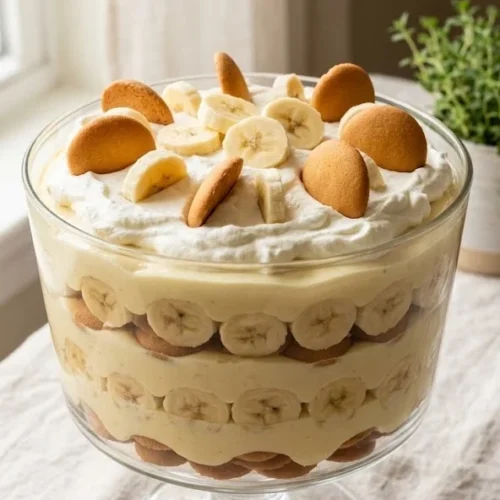
- Repeat the layers. Continue layering in the same order – wafers, bananas, pudding cream – until all components are used, finishing with a thick layer of pudding cream on top.
- Make the whipped topping. Beat the remaining one cup of cold heavy cream with the powdered sugar and vanilla extract until soft, billowy peaks form. Spread or pipe over the top of the assembled pudding.
- Garnish and chill. Arrange a few whole Nilla wafers and fresh banana slices decoratively across the top. Cover tightly and refrigerate for a minimum of 4 hours, with overnight strongly preferred for the best possible texture and flavor.
- Serve cold. Scoop generous portions into bowls and serve immediately straight from the refrigerator.
Variations and Tips
This recipe is one of the most flexible summer desserts ideas in the collection, and it adapts beautifully across dietary needs, flavor preferences, and serving formats.
Make it gluten free. Use certified gluten-free vanilla wafer cookies or crushed gluten-free shortbread in place of the Nilla wafers. The pudding cream layer is already naturally gluten free, making this one of the simplest summer desserts gluten free conversions you can make without compromising flavor or texture.
Make it a healthier version. For summer desserts healthy adaptations, substitute the heavy cream with full-fat coconut cream, use a sugar-free instant pudding mix, replace the sweetened condensed milk with sweetened condensed coconut milk, and use reduced-fat cream cheese. The result is lighter but still deeply creamy and satisfying.
Serve in individual cups. For summer desserts for a party where individual portions are more practical, layer the pudding in clear plastic cups or mason jars. They look beautiful, are easy to grab and go, and eliminate the need for serving utensils entirely.
Add a strawberry layer. Alternate banana slices with fresh sliced strawberries for a fruit-forward version that leans into summer desserts strawberry territory beautifully and adds a gorgeous pop of color between the layers.
Pro tip: Toss the banana slices in a teaspoon of fresh lemon juice before layering. The acid slows oxidation significantly, keeping the bananas looking fresh and bright yellow for much longer – essential for summer desserts for a crowd that sits out during a party.
How to Meal Prep No-Bake Banana Pudding
This is one of the most practical summer desserts for a crowd in existence from a meal prep standpoint, because the entire dessert is better when made ahead of time rather than at the last minute.
The pudding cream can be made up to two days in advance and stored covered in the refrigerator. The full assembled pudding can be prepared up to 24 hours before serving and kept tightly covered in the refrigerator – the texture and flavor at the 12 to 24 hour mark is genuinely superior to a freshly assembled version.
For the cleanest presentation at a party, add the whipped cream topping and the fresh garnish of banana slices and wafers no more than one to two hours before serving. This keeps the top layer looking fresh and prevents any surface browning on the banana garnish.
Leftover banana pudding keeps well in the refrigerator for up to three days, though the wafers will continue to soften and the bananas may darken slightly. The flavor remains excellent throughout, and many people argue that day two banana pudding is the best version of all.
Frequently Asked Questions
Can I make this banana pudding the night before a party? Not only can you – you absolutely should. Overnight chilling is when this dessert reaches its peak texture and flavor. The wafers fully soften, the layers meld together, and the pudding cream sets into something deeply creamy and cohesive. It is one of the rare summer desserts recipes that is genuinely better the next day.
How do I keep the bananas from turning brown? Toss the sliced bananas in a small amount of fresh lemon juice before layering. This slows oxidation significantly. Also ensure the banana slices are fully covered and sandwiched between pudding layers rather than exposed to air, and add any banana garnish on top no more than one to two hours before serving.
Can I make individual portions for summer desserts for kids? Absolutely, and kids love them. Layer the pudding in clear plastic cups or small mason jars so the layers are visible, and let kids top their own with a wafer and banana slice. It becomes an interactive and memorable summer desserts for kids activity that doubles as a party favor.
Is this recipe suitable as summer desserts for a crowd at an outdoor party? Yes, with one important consideration. Because this is a cream-based dessert, it should not sit out at room temperature for more than two hours in warm weather. Keep it refrigerated until shortly before serving, and if the event is outdoors in the heat, nestle the serving dish inside a larger bowl filled with ice to keep it cold throughout the party.
Cultural Context
Banana pudding is one of the most deeply rooted desserts in American Southern culinary tradition, with origins that trace back to the late nineteenth century when bananas became widely available in the United States following the expansion of the tropical fruit trade. Early versions were made with homemade custard and simple sponge cake or biscuit layers, baked in the oven until the custard set.
The modern version – built with Nilla wafers and instant pudding for convenience – became a Southern household staple through much of the twentieth century and has remained one of the most requested potluck and celebration desserts in American home cooking ever since. The no-bake adaptation emerged as home cooks sought ways to preserve the beloved flavor profile while eliminating the oven entirely, making it a natural fit for the summer desserts no bake movement that has grown significantly in recent years.
Today, banana pudding appears in everything from high-end restaurant menus to food truck windows to mason jar party favors, but its soul remains exactly what it always was – a generous, unpretentious, deeply comforting summer desserts for a crowd recipe that brings people together around a table and sends them home happy.
No-Bake Banana Pudding
Equipment
- mixing bowls
- hand mixer or stand mixer
- spatula
- trifle dish or 9×13 pan
- whisk
Ingredients
- 8 oz cream cheese, softened
- 14 oz sweetened condensed milk
- 3.4 oz instant vanilla pudding mix
- 1 cup cold whole milk
- 2 tsp vanilla extract
- 2 cups heavy whipping cream
- 4-5 ripe bananas, sliced
- 11 oz Nilla wafers
- 1 cup heavy whipping cream (for topping)
- 2 tbsp powdered sugar
- 1 tsp vanilla extract (for topping)
Instructions
- Beat softened cream cheese in a large bowl until smooth and fluffy with no lumps.
- Add sweetened condensed milk, pudding mix, milk, and vanilla extract. Beat until thickened and smooth.
- In a separate bowl, whip heavy cream until stiff peaks form.
- Gently fold whipped cream into pudding mixture until light and airy.
- Chill pudding mixture for 15 minutes before assembling.
- Layer Nilla wafers on the bottom of a dish.
- Add a layer of banana slices over the wafers.
- Spread a layer of pudding mixture over bananas.
- Repeat layers until all ingredients are used, finishing with pudding on top.
- Whip remaining cream with powdered sugar and vanilla, then spread over the top.
- Garnish with wafers and banana slices, then refrigerate at least 4 hours or overnight.
- Serve cold directly from the refrigerator.