
There’s something genuinely magical about biting into a cupcake and discovering a hidden surprise inside. These St. Patrick’s Day Oreo Cupcakes deliver exactly that kind of magic.
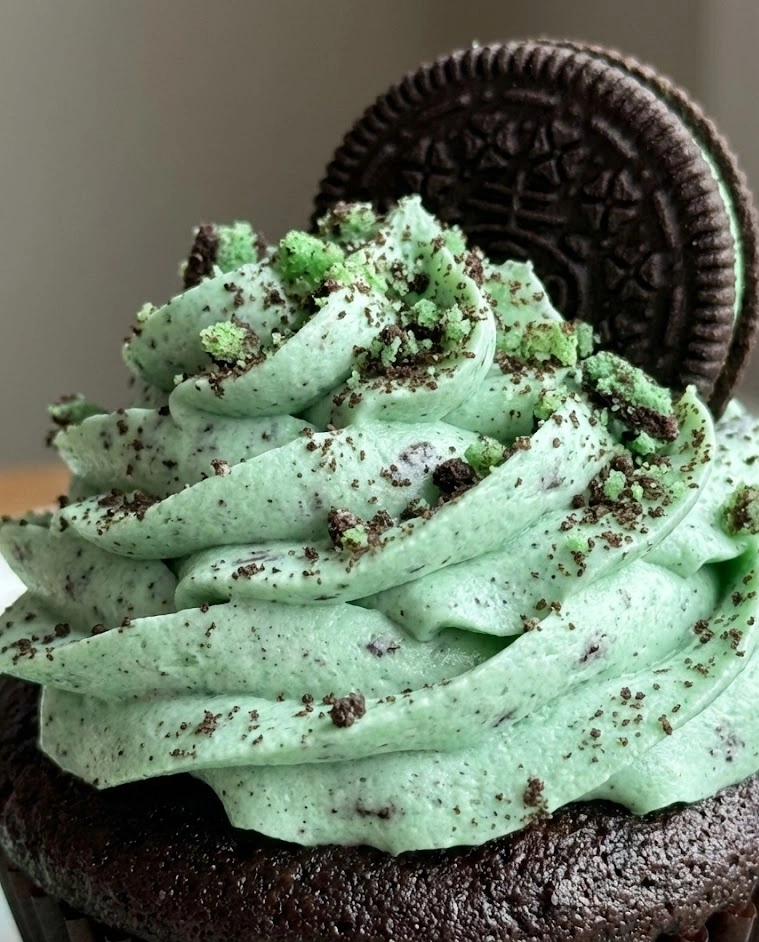
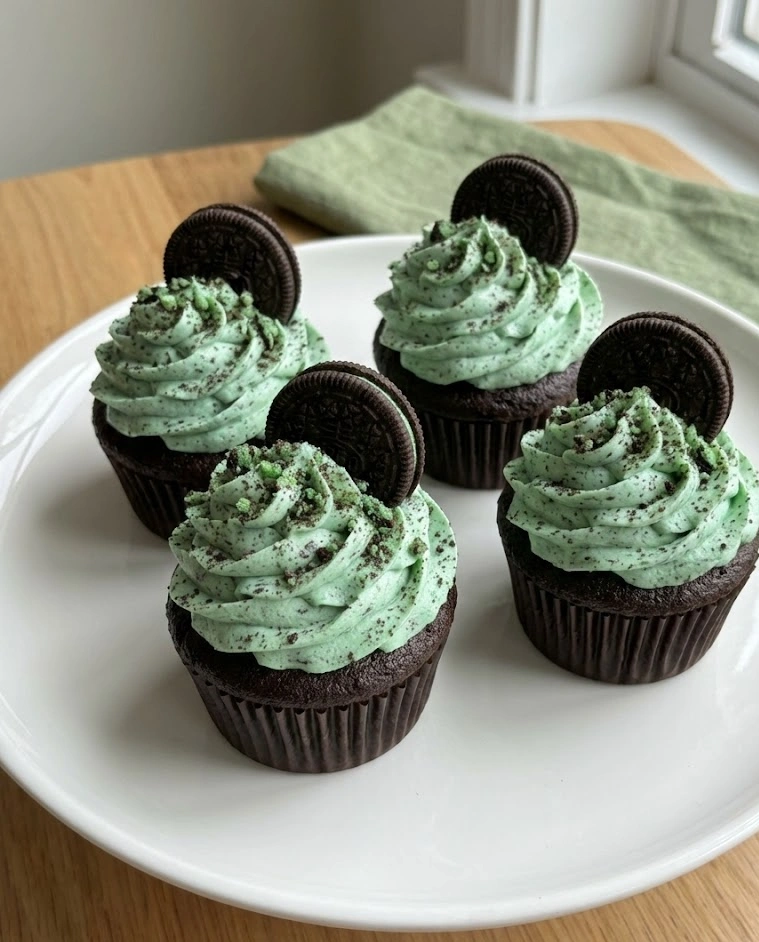
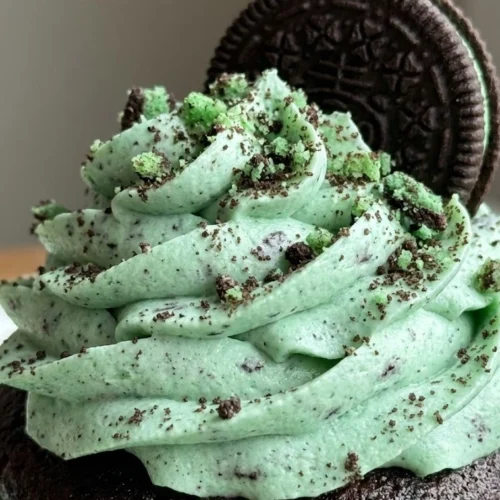
Rich, moist chocolate cupcakes with an entire Oreo cookie baked right into the center, topped with swirls of vibrant green buttercream and decorated with festive sprinkles and gold accents. They’re one of those St Patrick’s Day treats that looks stunning on your dessert table and tastes even better than they look.
The hidden Oreo creates a delightful textural contrast—soft, tender cake surrounding a crispy cookie center that stays remarkably intact through the baking process. It’s the kind of surprise that makes people smile mid-bite and immediately reach for a second cupcake.
Why You’ll Love These St. Patrick’s Day Oreo Cupcakes
Let’s start with the most compelling reason: the wow factor is absolutely undeniable.
When someone bites into what appears to be a standard cupcake and discovers that whole Oreo hidden inside, the reaction is universally delighted surprise. That element of discovery transforms a simple cupcake into an experience. These are the St Patrick’s Day treats people remember and talk about long after your celebration ends.
The flavor combination is absolutely stellar. Chocolate cake and Oreo cookies are a match made in dessert heaven—the deep cocoa richness of the cake complements the sweet vanilla cream and chocolate cookie perfectly. Add the smooth, buttery vanilla frosting tinted festive green, and you have layers of flavor and texture that work together beautifully.
They’re remarkably straightforward to make. Despite looking elaborate and professional, these cupcakes come together with a simple box mix or from-scratch batter, standard Oreos, and basic buttercream. The “hidden Oreo” technique sounds fancy but is literally just placing a cookie in the batter before baking. That’s it. The simplicity-to-impressiveness ratio is off the charts.
These cupcakes are incredibly stable and transport beautifully. The Oreo inside actually provides structural support, and properly made buttercream holds its shape in any reasonable temperature. That makes them perfect for bake sales, potlucks, classroom parties, or any situation where your treats need to travel.
Finally, they’re endlessly customizable. Change the cake flavor, use different Oreo varieties, adjust the frosting color, or go wild with decorations. The base technique remains the same, but the possibilities are virtually unlimited.
Key Ingredients: Building Blocks of the Perfect Cupcake
Understanding what each component contributes helps you execute these St. Patrick’s Day Oreo Cupcakes flawlessly every single time.
Chocolate Cake Base: You can use a quality box mix (Devil’s Food or Dark Chocolate work beautifully) or your favorite from-scratch chocolate cake recipe. The key is a moist, tender crumb that doesn’t become dry or crumbly when baked. Box mixes are completely acceptable here—they’re engineered for consistent results and moisture retention. If using from-scratch, make sure your recipe includes some fat (oil or butter) and an acidic component (buttermilk or sour cream) for maximum tenderness.
Oreo Cookies: Regular Oreos are the classic choice, but this is where you can get creative. Mint Oreos add a refreshing element perfect for spring. Golden Oreos create a lighter visual when cut through. Pistachio Oreos lean into the green theme beautifully. Double Stuf Oreos provide extra filling for those who love that sweet cream. Use whatever speaks to you—they all work perfectly in this application.
Buttercream Frosting: Classic American buttercream—butter, powdered sugar, vanilla, and milk—creates the smoothest, most pipeable frosting that holds beautiful swirls and decorations. The ratio is crucial: too much butter and it’s greasy; too much sugar and it’s grainy; too much liquid and it won’t hold shape. Getting this balance right creates frosting that tastes amazing and performs beautifully.
Green Food Coloring: Gel food coloring is vastly superior to liquid for achieving vibrant, saturated colors without adding excess moisture that can thin your frosting. Start with a small amount and add gradually until you reach your desired shade. You can go pale mint, bright kelly green, or deep forest—each creates a different mood and aesthetic.
Butter: Use real, unsalted butter at room temperature for both the cake (if making from scratch) and definitely for the frosting. Room temperature butter creams properly and creates the fluffy, smooth texture that makes buttercream so luxurious. Cold butter won’t incorporate properly; melted butter creates the wrong texture entirely.
Powdered Sugar: Also called confectioner’s sugar, this is the foundation of buttercream. Sift it before using to eliminate lumps that create a grainy texture. The fine texture of powdered sugar dissolves seamlessly into butter and creates that signature smooth mouthfeel.
Vanilla Extract: Pure vanilla extract adds depth and warmth to both the cake and frosting. It rounds out sweetness and makes everything taste more complex and homemade. Never skip the vanilla—the flavor difference is significant.
Decorations: Rainbow sprinkles, gold star sprinkles, shamrock-shaped sugar decorations, edible gold leaf, or mini chocolate chips all make excellent finishing touches. Decorations are where your personality and creativity shine through.
How to Make St. Patrick’s Day Oreo Cupcakes
These cupcakes come together through a series of simple steps. Follow them carefully and you’ll achieve bakery-quality results at home.
Step 1: Preheat your oven to 350°F (175°C). Line a standard 12-cup muffin tin with paper cupcake liners. This preparation step is essential—cupcakes baked without liners stick terribly and are nearly impossible to remove cleanly.
Step 2: Prepare your chocolate cake batter according to package directions if using a box mix, or following your recipe if making from scratch. Mix until just combined—overmixing develops gluten and creates tough, dense cupcakes. The batter should be smooth but still have a few small lumps. Perfectly smooth batter indicates overmixing.
Step 3: Fill each cupcake liner about one-third full with batter. This is less than you might instinctively pour, but it’s crucial. You need room for the Oreo and then more batter on top without overflow.
Step 4: Gently press one whole Oreo cookie into the center of each portion of batter. Press it down until it’s mostly submerged but not touching the bottom of the liner. The cookie should be tilted slightly or sitting flat—either works perfectly.
Step 5: Spoon additional batter over each Oreo, covering it completely. The Oreos should be fully enclosed with batter, though it’s fine if the very top edge peeks through slightly. Fill each liner until it’s about two-thirds to three-quarters full. This is the correct fill level for cupcakes—it allows room for rise without overflow.
Step 6: Gently tap the muffin tin on the counter 2-3 times to release any large air bubbles trapped in the batter. This prevents large holes or tunnels in your finished cupcakes.
Step 7: Bake for 18-22 minutes, or until a toothpick inserted into the cake portion (not the Oreo) comes out clean or with just a few moist crumbs. The tops should spring back when lightly pressed. Baking time varies by oven, so start checking at 18 minutes. Overbaked cupcakes are dry and crumbly—slightly underbaked is always better than slightly overbaked.
Step 8: Remove from the oven and let the cupcakes cool in the pan for 5 minutes. This brief resting period allows them to set and makes them easier to remove without breaking. After 5 minutes, transfer cupcakes to a wire cooling rack to cool completely. Frosting warm cupcakes causes the frosting to melt and slide off—patience here is non-negotiable.
Step 9: While cupcakes cool, make your buttercream frosting. In a large bowl using a hand mixer or in a stand mixer with the paddle attachment, beat room-temperature butter on medium speed for 2-3 minutes until light and fluffy. This initial beating incorporates air and creates a lighter texture.
Step 10: Gradually add sifted powdered sugar, one cup at a time, beating on low speed after each addition. Scrape down the bowl occasionally to ensure even mixing. Once all the sugar is incorporated, add vanilla extract and 2 tablespoons of milk or heavy cream.
Step 11: Beat on medium-high speed for 3-4 minutes until the frosting is light, fluffy, and smooth. If it’s too thick, add more milk one teaspoon at a time. If it’s too thin, add more powdered sugar ¼ cup at a time. The ideal consistency holds stiff peaks but is still smooth and pipeable.
Step 12: Add green gel food coloring, starting with 3-4 drops for pale green or 8-10 drops for vibrant green. Beat until the color is completely uniform with no streaks. Adjust until you achieve your desired shade.
Step 13: Transfer the frosting to a piping bag fitted with your favorite large decorating tip. A large star tip creates beautiful swirls with defined edges. A large round tip creates smooth, classic domes. Both work beautifully—it’s purely aesthetic preference.
Step 14: Pipe frosting onto each completely cooled cupcake. Start from the outer edge and work your way toward the center in a circular motion, building upward to create height and dimension. Proper piping technique creates that professional, bakery-quality appearance.
Step 15: While the frosting is still fresh and slightly tacky, add your decorations. Sprinkle rainbow sprinkles, gold stars, or green sanding sugar generously over the frosting. Press small shamrock decorations or edible gold leaf gently into the peaks for extra festive detail.
Step 16: Allow the frosting to set for 15-20 minutes before serving or storing. This brief setting time helps the decorations adhere properly and the frosting develop a slight crust that makes them easier to handle.
Variations & Creative Ideas for Every Preference
These St. Patrick’s Day Oreo Cupcakes adapt beautifully to different flavors, dietary needs, and presentation styles.
Mint Chocolate Version: Use mint Oreos inside and add ½ teaspoon peppermint extract to both the cake batter and the frosting. The mint-chocolate combination is refreshing and perfect for spring. Top with crushed Andes mints or chocolate shavings for extra sophistication.
Vanilla Rainbow Cupcakes: Use vanilla or funfetti cake batter instead of chocolate for a lighter, more colorful base. The vanilla allows any hidden Oreo variety to shine through more prominently. Funfetti adds festive color that creates a rainbow effect when cut.
Cookies and Cream Frosting: Crush 6-8 Oreos finely and fold them into your finished vanilla buttercream before piping. This creates spectacular cookies-and-cream frosting with visible cookie pieces throughout. It’s richer and more visually interesting than plain frosting.
Cream Cheese Frosting Alternative: Replace half the butter in the frosting recipe with room-temperature cream cheese for tangy, less-sweet frosting that balances the sweetness of the Oreo beautifully. This is especially good if you find traditional buttercream too sweet.
Gluten-Free Version: Use a gluten-free chocolate cake mix or your favorite gluten-free chocolate cake recipe. Gluten-free Oreos are now widely available and work identically to regular Oreos in this application. The hidden Oreo technique works perfectly regardless of gluten content.
Vegan Adaptation: Use vegan chocolate cake mix or recipe, vegan Oreos (which are accidentally vegan in their original form), and vegan buttercream made with plant-based butter. The results are remarkably similar to the traditional version.
Mini Cupcake Version: Use mini cupcake pans and mini Oreos. Adjust baking time to 10-12 minutes. These bite-sized versions are perfect for large parties where you want variety or for children who prefer smaller portions.
Pro Tip: Don’t twist open the Oreos before baking. Use them whole, cream filling and all. The cream filling actually helps keep the cookie intact during baking and adds extra sweetness and moisture to the area immediately surrounding the cookie. Separated cookies are more likely to break or become too hard during baking.
Frosting Techniques That Create Bakery-Quality Results
The difference between homemade-looking cupcakes and bakery-quality ones often comes down to frosting technique. Here’s how to elevate your game.
Classic Swirl: Hold your piping bag at a 90-degree angle directly above the cupcake center. Apply steady pressure and move in a circular motion from the outside edge toward the center, gradually building upward. Release pressure and pull straight up to create a peaked top. This creates that iconic ice cream cone swirl that looks professional and polished.
Rosette: Using a large star tip, start at the outer edge and pipe in a tight circular motion, spiraling inward and upward to create a rose-like appearance. This technique is stunning and takes only seconds once you practice a few times.
Smooth Dome: Use a large round tip and pipe frosting in a circular motion, building up gradually to create a smooth, rounded dome. Use an offset spatula to smooth any ridges or imperfections. This classic look is timeless and elegant.
Ruffled Edge: Use a petal tip or large leaf tip to create ruffled, textured edges that look incredibly elaborate but are actually quite simple. Pipe in short, overlapping bursts while slowly rotating the cupcake.
Two-Tone Effect: Fill half your piping bag with white frosting and half with green. When piped, the two colors create a beautiful marbled or striped effect that looks extremely professional with minimal extra effort.
Temperature Matters: Frosting that’s too warm will be loose and won’t hold shape. Frosting that’s too cold will be stiff and difficult to pipe. Ideal frosting temperature is cool room temperature—about 68-70°F. If your frosting becomes too warm while working, refrigerate the piping bag for 10 minutes to firm it back up.
Storage & Make-Ahead Strategy
These St. Patrick’s Day Oreo Cupcakes store beautifully, making them ideal for stress-free party planning.
Room Temperature Storage: Frosted cupcakes can be stored at room temperature in an airtight container for up to 2 days. Keep them in a cool, dry place away from direct sunlight. The Oreo inside helps maintain moisture, so these stay fresh longer than standard cupcakes.
Refrigerator Storage: For longer storage, refrigerate frosted cupcakes in an airtight container for up to 5 days. Bring them to room temperature 30-60 minutes before serving for the best flavor and texture. Cold cupcakes are denser and the frosting is firmer—room temperature allows all the flavors and textures to shine.
Freezer Storage: Unfrosted cupcakes freeze beautifully for up to 3 months. Wrap them individually in plastic wrap, then place in a freezer-safe bag. Thaw at room temperature for 2-3 hours, then frost and decorate. Frosted cupcakes can be frozen but the frosting texture changes slightly upon thawing—it’s workable but not ideal.
Make-Ahead Timeline: Bake cupcakes up to 2 days ahead and store at room temperature wrapped tightly. Make frosting up to 1 week ahead and refrigerate in an airtight container—bring to room temperature and re-whip before using. Frost and decorate cupcakes the day of or the day before your event for optimal freshness and appearance.
Transporting: These travel remarkably well. Use a cupcake carrier or place them in a sturdy box with dividers. Keep them level during transport and in a cool environment. Buttercream melts in heat, so avoid leaving them in a hot car. A cooler with ice packs (not touching the cupcakes directly) works for longer travels.
Creative Presentation Ideas That Maximize Impact
How you present these St. Patrick’s Day Oreo Cupcakes can elevate them from delicious treats to the absolute centerpiece of your celebration.
Tiered Cupcake Tower: Arrange cupcakes on a tiered stand for dramatic height and visual impact. Alternate cupcakes with small decorative elements like shamrock cutouts, gold coins, or fresh flowers for a truly stunning display.
Rainbow Arrangement: Frost batches in graduating shades of green—pale mint to deep forest—and arrange them in color gradient order. Add cupcakes in gold, orange, or other rainbow colors at the ends to create a complete rainbow effect.
Pot of Gold Display: Surround your cupcake display with gold foil-wrapped chocolate coins, creating the illusion that the cupcakes are the treasure in a leprechaun’s pot. Use green tissue paper or shredded paper as filler for added effect.
Individual Cupcake Boxes: Package individual cupcakes in clear boxes tied with green and gold ribbon. These make perfect party favors or gifts that feel special and personal. Add a small tag with a festive message for extra charm.
Dessert Table Integration: Arrange your cupcakes alongside other St Patrick’s Day treats in complementary colors—green, gold, white, and rainbow. The variety creates visual interest and offers guests options while maintaining a cohesive theme.
Numbered Cupcakes: Use small number candles or fondant numbers to create a countdown display, a birthday celebration, or mark special milestones. This personalizes the treats and makes them meaningful beyond just their deliciousness.
Why These Cupcakes Define St. Patrick’s Day Celebration
Among all the St Patrick’s Day treats you could make, these Oreo Cupcakes represent everything that makes holiday baking special.
They combine familiar comfort—chocolate cake, Oreos, buttercream—with festive creativity through color, decoration, and that delightful hidden surprise. That balance between the known and the novel is what makes them universally appealing.
The hidden Oreo transforms a standard cupcake into something memorable. It’s the kind of detail people talk about—”Did you try those cupcakes with the Oreo inside?”—and that word-of-mouth excitement is priceless.
They’re impressive enough to serve at sophisticated adult gatherings but fun enough for children’s parties. That versatility across age groups and occasions makes them an invaluable recipe to have in your repertoire.
Most importantly, they deliver genuine joy. The surprise inside, the beautiful frosting, the festive colors—every element contributes to making people smile. And isn’t that what the best St Patrick’s Day treats are really about?
Bake These and Create Magic
These St. Patrick’s Day Oreo Cupcakes prove that you don’t need professional training or expensive equipment to create bakery-quality treats that wow your guests.
With simple techniques, accessible ingredients, and a little creativity, you can bake cupcakes that look stunning, taste incredible, and create genuine moments of delight when people discover that hidden Oreo treasure inside.
So preheat that oven, grab your Oreos, and get ready to bake a batch of the most talked-about St Patrick’s Day treats your celebration has ever seen. Your cupcakes—and the smiles they create—are waiting.
St. Patrick’s Day Oreo Cupcakes
Equipment
- 12-cup muffin tin
- cupcake liners
- mixing bowls
- hand or stand mixer
- piping bag and decorating tip
Ingredients
- 1 box chocolate cake mix (plus ingredients listed on box)
- 12 Oreo cookies
- 1 cup unsalted butter, room temperature
- 4 cups powdered sugar, sifted
- 2-3 tbsp milk or heavy cream
- 1 tsp vanilla extract
- green gel food coloring
- rainbow sprinkles, gold stars, or shamrock decorations (optional)
Instructions
- Preheat oven to 350°F (175°C) and line a 12-cup muffin tin with cupcake liners.
- Prepare chocolate cake batter according to package directions. Mix until just combined.
- Fill each liner one-third full with batter. Place one whole Oreo in the center of each and cover with more batter until liners are two-thirds full.
- Bake for 18–22 minutes or until a toothpick inserted into the cake portion comes out clean. Cool 5 minutes in pan, then transfer to wire rack to cool completely.
- Beat room-temperature butter until fluffy. Gradually add powdered sugar, then mix in vanilla and milk. Beat until smooth and fluffy.
- Add green gel food coloring and mix until desired shade is reached.
- Pipe frosting onto completely cooled cupcakes using a large star or round tip.
- Decorate with sprinkles or festive toppings. Allow frosting to set before serving.