

In the world of Christmas cookies recipes, sometimes the simplest treats create the biggest impact. If you want a cookie that’s soft, wonderfully chewy, and catches the light with a beautiful, festive sparkle, you need to master the Sanded Sugar Cookie. These cookies are incredibly versatile—they can be rolled, flattened, or left round—and are dressed up solely by that vibrant, crystallized sugar coating.
This particular sanded sugar cookies recipe christmas version guarantees a superior soft texture thanks to its unique leavening combination. But the real magic lies in a simple baking trick: applying the sanding sugar halfway through the bake time. This technique causes the sugar to “melt” and set perfectly into the dough, creating a gorgeous, high-impact finish that won’t flake off. It’s the perfect way to add brilliance to your holiday platter with minimal effort!
Why Sanded Sugar Cookies Belong on Your Platter
This cookie stands out among Christmas cookies recipes because it delivers high visual appeal with simple, comforting flavor.
- Soft and Chewy Texture: This dough uses a similar base to a Snickerdoodle, incorporating both baking powder and cream of tartar. This mix ensures the cookies rise lightly, crackle gently, and stay incredibly soft and chewy, avoiding the dreaded hard, dry cookie fate.
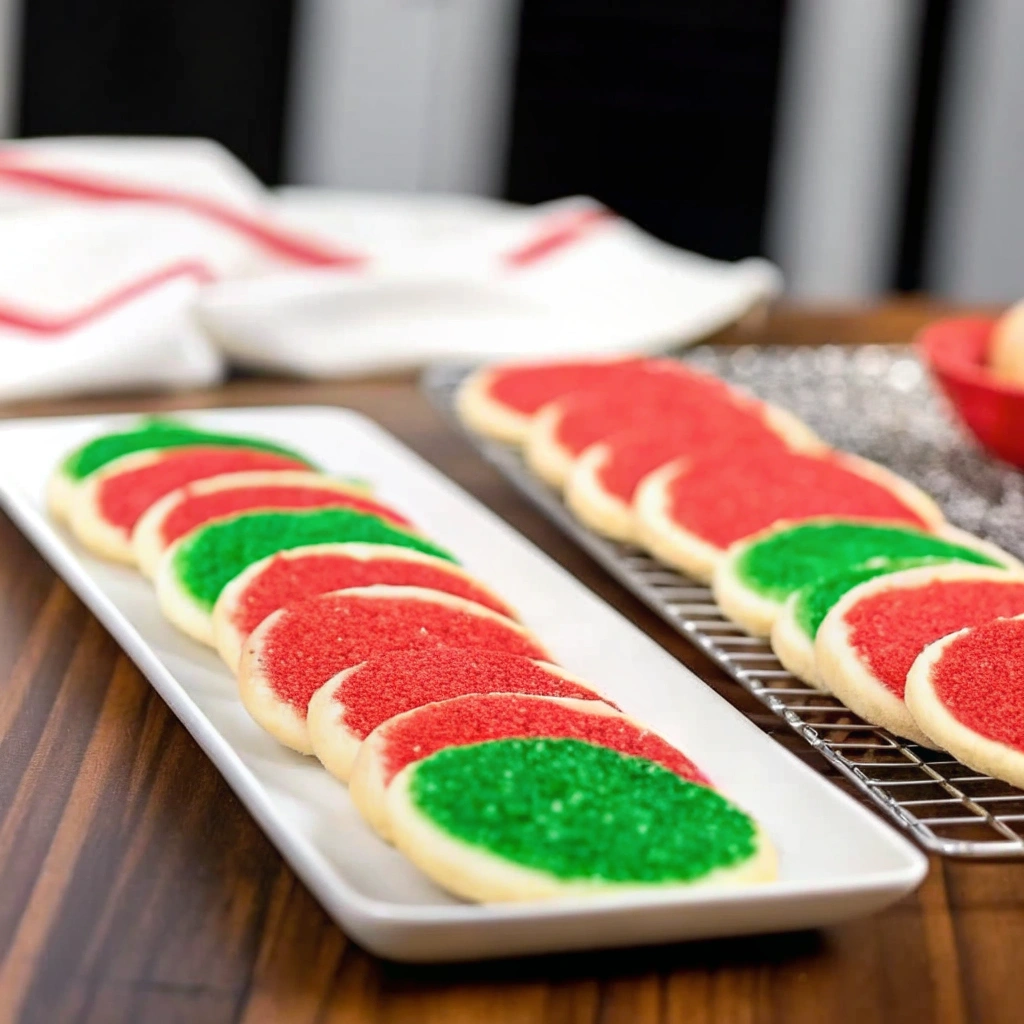
- Maximum Sparkle: The use of sanding sugar (a coarse sugar that is highly reflective) combined with the mid-bake application trick maximizes the cookie’s brilliance. The sugar fuses to the cookie, guaranteeing a stunning, professional-looking, and very festive sparkle.
- Versatile Shape: This dough works beautifully when simply rolled into balls (for a fluffy, rounded cookie) or when lightly flattened with a spoon (for a thinner, chewier, disc-shaped cookie). It’s perfect for those who want a custom look without tedious cutting.
- Flavor Base: The base flavor is pure vanilla and butter, making it the perfect neutral canvas for your festive decorations.
The Anatomy of a Perfect Sparkle Cookie
To nail the texture and the sparkle in this sanded sugar cookies recipe christmas style, pay close attention to the ingredient handling and the timing of the decoration.
The Double-Duty Dough
The key to the soft texture is the leavening.
- Cream of Tartar: This ingredient adds a faint tang and promotes a tender crumb by preventing sugar crystallization. It works with the baking powder and baking soda to ensure proper lift and chewiness.
- Chilling is Key: The recipe requires a long chill time (about 2 1/2 hours). This step is non-negotiable. Chilling ensures the cookies do not spread into flat, thin puddles, which would sacrifice the soft texture.
The Mid-Bake Sugar Trick
This technique is what makes the cookies shine:
- Partial Bake: The cookies are baked for about two-thirds of the time (around 8 minutes).
- Sugar Application: They are briefly removed from the oven, quickly coated in sanding sugar, and then returned to finish baking.
- Melting and Fusing: In the last few minutes, the heat softens the butter further, allowing the large sugar crystals to sink and partially melt onto the surface, fusing them to the cookie.
Achieving Your Desired Shape
You can control the final look of your cookie with a simple trick:
- For Fluffy Cookies: Roll the dough into walnut-sized balls and place them directly on the sheet. They will stay rounded and soft.
- For Flat Cookies: Roll the dough into balls, but then gently press the tops with the back of a spoon to flatten them slightly. This encourages a thinner, slightly chewier cookie that still maintains its sparkle.
Step-by-Step: Baking the Softest, Sparkliest Cookies
Follow this precise method to achieve beautiful, soft, and perfectly crystallized cookies every time.
| Step | Action | Notes |
| Prep Time | 5 Minutes | |
| Chill Time | 2 1/2 Hours (Minimum) | |
| Cook Time | 12 Minutes | |
| Yields | 12 Cookies |
Preparing and Chilling the Dough
- Cream Wet: In a large bowl, cream the softened unsalted butter until creamy. Add the sugar and beat until well combined. Add in the egg and vanilla extract and beat until the mixture is light and fluffy.
- Mix Leaveners: Add the salt, baking powder, cream of tartar, and baking soda. Mix well to ensure they are evenly distributed.
- Add Flour and Chill: Stir in the flour a little at a time until the dough is just combined. Do not overmix. Wrap the dough tightly and chill in the fridge for about 2 1/2 hours.
- Preheat: Preheat your oven to 350°F (175°C).
Shaping, Baking, and Sanding
- Roll and Shape: Roll the chilled dough into walnut-sized balls and place them on an ungreased cookie sheet. Flatten the tops slightly with the back of a spoon if you prefer a thinner cookie.
- Initial Bake: Bake for approximately 8 minutes. The cookies should look set but still pale.
- The Sanding Trick: Carefully pull the cookies from the oven. Spoon or sprinkle a generous amount of colored sanding sugar onto the tops. You can use a small cookie cutter to create defined shapes in the sugar if desired.
- Final Bake: Return the cookies to the oven and bake for another 4-5 minutes, or until the bottoms are lightly browned and the sugar has melted slightly into the surface.
- Cool: Let the cookies cool completely on a wire rack.
Pro-Tips and Flavor Variations
Ensure your sanded sugar cookies recipe christmas version is flawless with these key solutions.
Troubleshooting the Dough
- Preventing Dryness: If you feel the need to use extra flour while rolling, use parchment paper instead. Adding too much flour is the number one cause of dry, crumbly cookies.
- Don’t Skip the Chill: If you try to bake this dough without chilling, the butter will melt too fast, and your cookies will spread into one giant, flat sheet. 2 1/2 hours is the ideal time.
Flavor Upgrades
- Almond Sparkle: Add 1/2 teaspoon of almond extract along with the vanilla extract for a subtle, complex flavor that is very popular during the holidays.
- Zesty Cranberry: Add 1 tablespoon of fresh orange zest to the dough, and sprinkle with red sanding sugar for a bright, citrusy twist.
- Vanilla Bean: Use 1 teaspoon of vanilla bean paste instead of liquid vanilla for a deeper, more aromatic flavor with beautiful black flecks.
Storage and Gifting Excellence
The sturdiness and beauty of these cookies make them perfect for sharing.
- Storing Baked Cookies: These cookies stay perfectly soft in an airtight container at room temperature for up to 5 days.
- Gifting: The durable sanding sugar topping makes these ideal for stacking and packaging in decorative tins or bags. Their shine remains intact!
- Freezing Dough Balls: Roll the dough into balls, freeze them on a baking sheet until solid, and then transfer them to a freezer bag. When ready to bake, place them on the sheet and bake from frozen (adding 2-3 minutes to the initial bake time before sanding).
Conclusion: Shine Bright This Holiday Season
This Sanded Sugar Cookies recipe is the perfect blend of simple preparation and dazzling presentation. By embracing the secret mid-bake sanding trick and the tenderizing power of cream of tartar, you can easily create a batch of soft, chewy, and sparkling cookies that look like they came straight from a professional bakery. Bring the brilliance of these shimmering treats to your holiday gathering this year!

Soft & Chewy Sanded Sugar Cookies
Equipment
- mixing bowls
- hand mixer or stand mixer
- parchment paper
- baking sheet
- wire cooling rack
Ingredients
- 1/2 cup unsalted butter, softened
- 3/4 cup granulated sugar
- 1 large egg
- 1 teaspoon vanilla extract
- 1/2 teaspoon salt
- 1/2 teaspoon baking powder
- 1/2 teaspoon cream of tartar
- 1/4 teaspoon baking soda
- 1 1/4 cups all-purpose flour (spooned & leveled)
- Colored sanding sugar for topping (red, green, gold, etc.)
Instructions
- Cream softened butter until smooth, then add sugar. Beat until fluffy. Add egg and vanilla extract and mix until fully combined.
- Mix in salt, baking powder, cream of tartar, and baking soda. Ensure they are evenly incorporated.
- Stir in flour gradually until dough comes together. Do not overmix.
- Wrap dough tightly and chill for at least 2.5 hours for best texture and shape retention.
- Preheat to 350°F (175°C). Line baking sheet with parchment.
- Roll chilled dough into walnut-sized balls. For flatter cookies, lightly press tops with spoon.
- Bake for 8 minutes, until set but still pale.
- Remove cookies briefly. Sprinkle generously with sanding sugar. Return to oven.
- Bake 4–5 additional minutes, until bottoms are lightly golden and sugar has fused to the surface.
- Cool completely on a wire rack. Sugar top will set into a glossy sparkle.
Notes
• Chilling is essential for preventing excessive spread.
• Use parchment—avoid greasing the pan to maintain soft texture.
• For extra sparkle, mix multiple sanding sugar colors. Flavor Variations:
• Almond Sparkle: Add 1/2 tsp almond extract.
• Orange Cranberry: Add 1 tbsp fresh orange zest + red sanding sugar.
• Vanilla Bean: Replace vanilla with 1 tsp vanilla bean paste. Storage:
Store cookies in an airtight container at room temp for 5 days.
Freeze dough balls up to 3 months; bake from frozen adding 2–3 min before sanding.