
There’s something magical about taking a classic treat and transforming it into something whimsical and festive. These Leprechaun Hat S’mores are exactly that kind of magic.
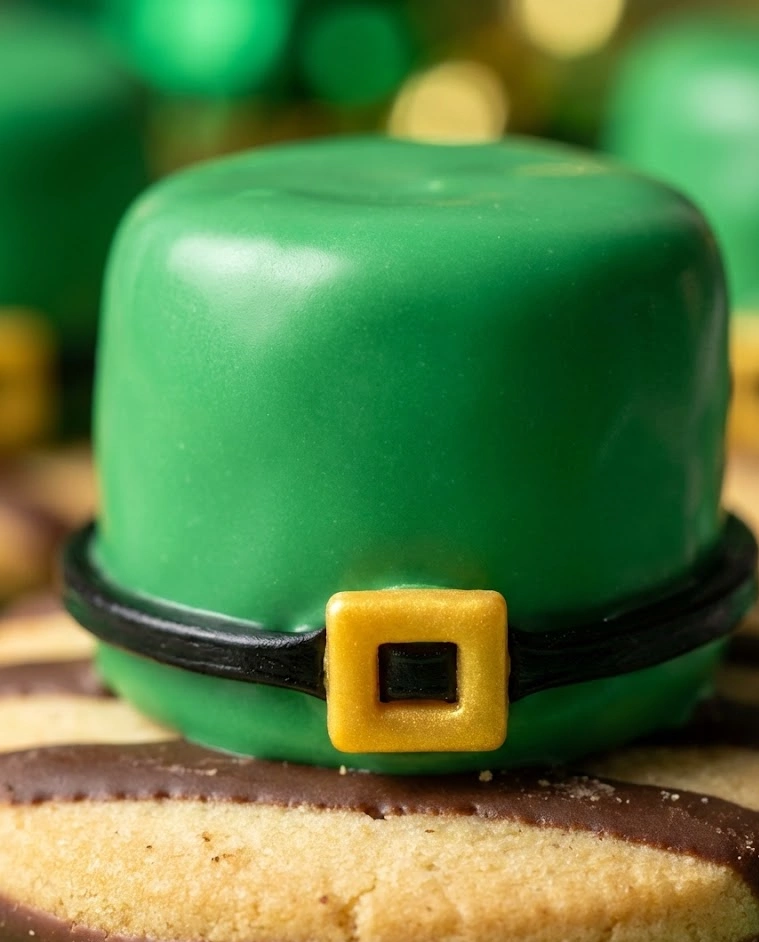
They’re one of those St Patrick’s Day treats that makes everyone—kids and adults alike—smile the moment they see them. Chocolate-covered marshmallows cleverly decorated to look like tiny leprechaun hats, complete with edible gold buckles and green graham cracker “brims.”
No campfire required, no complicated techniques, and no special equipment. Just pure, delightful creativity that tastes as good as it looks.
Why You’ll Love These Leprechaun Hat S’mores
Let’s start with the most obvious reason: they’re absolutely adorable.
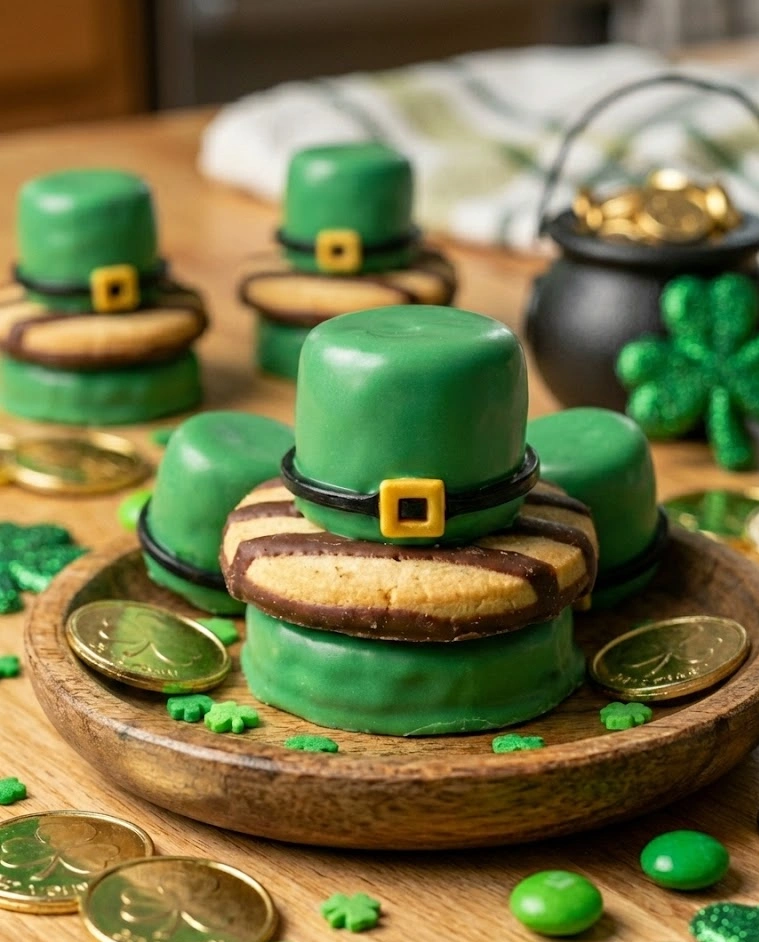
These treats are Instagram-worthy, party-table-ready, and guaranteed to be the conversation starter at any St Patrick’s Day gathering. The visual impact is immediate and undeniable. When people see a platter of tiny leprechaun hats arranged on a serving tray, they stop in their tracks.
They’re also remarkably easy to make. If you can dip a marshmallow in melted chocolate, you can make these. There’s no baking involved, no temperature-sensitive candy making, and no artistic skill required beyond basic assembly. This is one of those St Patrick’s Day treats that looks impressive without demanding significant time or expertise.
Kids absolutely love making these. The hands-on assembly process is engaging and fun without being frustrating or overly complicated. It’s the perfect balance of creative involvement and achievable success. Children as young as four or five can participate meaningfully with minimal supervision.
The flavor is classic and universally beloved. S’mores are an American treasure for a reason—the combination of chocolate, marshmallow, and graham cracker is profoundly satisfying. By reimagining that combination through a St Patrick’s Day lens, you get festive visual appeal without sacrificing the taste that makes s’mores so special.
Finally, they’re incredibly versatile. Make them for classroom parties, family gatherings, dessert tables, or just because it’s March and you want something fun. They work beautifully as an afternoon craft activity or as a stunning dessert centerpiece.
Key Ingredients: Building Your Leprechaun Hats
The beauty of these Leprechaun Hat S’mores lies in their simplicity. Each ingredient plays a specific structural or decorative role.
Large Marshmallows: These form the “crown” of the leprechaun hat—the tall, cylindrical portion. Size matters here. Standard large marshmallows have the right height-to-width ratio to look like proper hat crowns. Mini marshmallows are too small and won’t have the visual impact you’re after. Fresh marshmallows are essential—stale ones become hard and difficult to work with.
Green Chocolate Melting Wafers: These are your primary coating and the source of that signature leprechaun green. Melting wafers (also called candy melts or coating chocolate) are specifically formulated to melt smoothly, harden at room temperature with a beautiful sheen, and provide a clean, sweet chocolate flavor. They’re far superior to regular chocolate chips for dipping projects because they don’t require tempering and set perfectly every time.
Keebler Fudge Stripe Cookies: These become the hat “brims.” The circular shape is perfect, the fudge stripes add textural interest, and the cookie provides the classic graham cracker flavor that makes these recognizably s’mores. The size ratio between the marshmallow and the cookie creates the ideal proportions for a leprechaun hat.
Yellow Fondant or Yellow Fruit Leather: This creates the decorative belt and buckle detail around the base of each hat. Fondant is more traditional and easier to shape precisely, but fruit leather works beautifully as a more accessible, kid-friendly alternative that you can cut with kitchen scissors.
Black Edible Marker or Black Frosting Gel: This adds the buckle detail in the center of the yellow band. An edible marker is the easiest option for fine detail work, but a small tube of black decorating gel works just as well if drawn carefully.
Green Sanding Sugar (Optional): A light dusting of green sparkle adds that extra festive shimmer that takes these from cute to stunning. It’s optional but highly recommended for maximum visual impact.
How to Make Leprechaun Hat S’mores
These treats come together through a series of simple, methodical steps. Take your time with assembly and the results will be flawless.
Step 1: Line a baking sheet or large plate with parchment paper. This is your workspace and drying station. Having everything prepped before you start dipping is essential for smooth, stress-free assembly.
Step 2: Arrange your Fudge Stripe cookies on the parchment paper, fudge side down. These become your stable base and the “brim” of each leprechaun hat. Space them about 2 inches apart to give yourself room to work.
Step 3: Melt the green chocolate melting wafers according to package directions. Microwave in 30-second intervals, stirring thoroughly between each one, until completely smooth and fluid. Do not rush this step or overheat the chocolate—overheated melting wafers seize and become unusable. If the melted chocolate seems too thick, add a teaspoon of vegetable oil or coconut oil and stir to thin it to dipping consistency.
Step 4: Insert a toothpick or lollipop stick into the bottom of each marshmallow. This becomes your handle for dipping and makes the process significantly cleaner and easier. Push it in about halfway—secure enough to hold, but not so far that it pokes through the top.
Step 5: Hold a marshmallow by its toothpick handle and dip it completely into the melted green chocolate. Submerge it fully, then lift it straight up and let the excess chocolate drip back into the bowl. Give it a gentle shake or tap the stick against the edge of the bowl to remove even more excess. You want a smooth, even coating without thick drips.
Step 6: Immediately place the chocolate-coated marshmallow onto the center of a prepared cookie. The warm chocolate acts as edible glue that bonds the marshmallow to the cookie as it sets. Press down very gently—just enough to ensure contact, not so much that you squash the marshmallow or make the chocolate ooze out.
Step 7: If using green sanding sugar, sprinkle it over the wet chocolate coating immediately, while the chocolate is still tacky. Once the chocolate sets, the sugar won’t stick. A light, even dusting creates that magical sparkle that makes these St Patrick’s Day treats truly special.
Step 8: Allow the chocolate-covered marshmallow hats to set completely at room temperature for about 15-20 minutes. The chocolate will firm up and develop a beautiful, smooth finish. Don’t rush this by refrigerating—rapid cooling can cause condensation and make the chocolate lose its sheen.
Step 9: While the chocolate sets, prepare your hat bands and buckles. Roll out yellow fondant to about ⅛-inch thickness and cut into strips approximately ½-inch wide and 2½ inches long. Alternatively, cut yellow fruit leather into similar strips using kitchen scissors. You need one strip per leprechaun hat.
Step 10: Cut small squares from the yellow strips to create the buckle shape. A square approximately ½-inch by ½-inch works perfectly. Use a small round piping tip, straw, or toothpick to punch or press a small hole in the center of each square to create the buckle’s center opening.
Step 11: Once the chocolate is fully set, carefully wrap a yellow strip around the base of each green marshmallow “crown,” right where it meets the cookie brim. The strip should overlap slightly in the back. Use a tiny dab of melted chocolate or a dot of corn syrup to secure the ends together.
Step 12: Place the buckle square on the front of the yellow band, securing it with another tiny dab of melted chocolate or corn syrup. Use a black edible marker or black frosting gel to draw a small rectangular outline inside the buckle’s center hole to enhance the buckle detail.
Step 13: Let everything set completely for another 10-15 minutes. Remove any toothpicks or sticks before serving. Arrange your finished Leprechaun Hat S’mores on a festive platter and prepare for compliments.
Variations & Tips to Customize Your Leprechaun Hats
These St Patrick’s Day treats are wonderfully adaptable to different preferences, skill levels, and available ingredients.
Different Cookie Base: If you can’t find Fudge Stripe cookies, regular graham crackers cut into 2-inch circles work beautifully. Chocolate graham crackers add extra richness. Shortbread cookies create a more buttery, delicate base. Oreos—with the cream filling removed and one chocolate cookie used as the base—create a darker, more dramatic contrast against the green.
White Chocolate Version: Use white chocolate melting wafers instead of green, then dust generously with green sanding sugar or edible glitter for a more subtle, elegant version of the same concept.
Rainbow Leprechaun Hats: Make batches in multiple colors—green, gold, orange, and white—to create a rainbow effect across your dessert table. This is especially stunning for larger parties where visual variety enhances the display.
Simplified Version for Very Young Children: Skip the fondant buckles entirely and simply wrap a strip of yellow fruit leather around the base. Use a gold star sprinkle pressed into the front as a simplified buckle alternative. The hats are still recognizable and adorable but much easier for little hands to execute successfully.
Extra Details: Add a small shamrock decoration on the front using green royal icing or a mini fondant shamrock. Pipe the wearer’s name on the brim in white chocolate for personalized party favors. These small touches transform simple treats into truly memorable ones.
Make-Ahead Friendly: These can be assembled completely up to 3 days in advance. Store in an airtight container at room temperature with parchment paper between layers to prevent sticking. They hold up beautifully and actually taste better after a day as the flavors meld together.
Pro Tip: Work in small batches when dipping marshmallows. Melt only about half your chocolate at a time so it stays warm and fluid longer. If the chocolate begins to thicken as you work, microwave it again for 15-20 seconds to restore the perfect dipping consistency. Patience with this step ensures smooth, professional-looking results every single time.
Storage & Serving: Keeping Your Leprechaun Hats Perfect
Proper storage ensures these adorable St Patrick’s Day treats stay as beautiful on serving day as they were when you made them.
Room Temperature Storage: Store completed Leprechaun Hat S’mores in an airtight container at room temperature for up to 5 days. Layer them carefully with parchment paper between each layer to prevent the decorations from smudging or sticking together. Room temperature storage maintains the chocolate’s sheen and the marshmallow’s perfect texture.
Avoid Refrigeration: Do not refrigerate these treats. Cold temperatures cause condensation when the treats return to room temperature, which makes the chocolate coating develop a dull, spotted appearance called “bloom.” The marshmallows can also become overly firm and lose their soft, pillowy texture.
Humidity Concerns: In very humid environments, chocolate can become sticky or soft. If you live in a humid climate, store the treats in an airtight container with a food-safe silica packet to absorb excess moisture. This keeps the chocolate crisp and the decorations intact.
Freezing: While not ideal, these can be frozen for up to 1 month if necessary. Wrap individually in plastic wrap, then place in a freezer-safe container. Thaw at room temperature for 2-3 hours before serving. The texture of the marshmallow changes slightly but they remain perfectly edible and still look adorable.
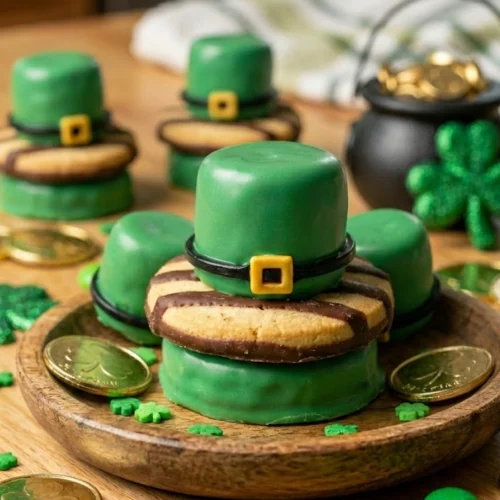
Serving Display: Arrange these on a tiered serving stand for maximum visual impact. The height creates drama and makes them look even more special. Scatter gold chocolate coins, rainbow candies, or green tissue paper shred around the base of the display for extra festive flair. These treats are as much about presentation as they are about flavor.
Creative Presentation Ideas for St Patrick’s Day Parties
How you present these Leprechaun Hat S’mores can elevate them from cute treats to the centerpiece of your entire celebration.
Pot of Gold Display: Arrange the hats in and around a small black cauldron or pot, with gold foil-wrapped chocolate coins spilling out around the base. The leprechaun hat theme combined with the pot of gold creates a complete, cohesive St Patrick’s Day narrative.
Individual Party Favors: Place each leprechaun hat in a clear cellophane bag tied with green curling ribbon. Attach a small tag that says “Thanks for being magically delicious!” or “Lucky to have you!” These make perfect take-home favors for classroom parties or family gatherings.
Rainbow Pathway: Create a rainbow arc on your dessert table using different colored treats and candies, with the Leprechaun Hat S’mores positioned at one end as the “treasure” at the end of the rainbow.
Dessert Table Centerpiece: Stack the hats in a pyramid formation on a cake stand, creating a tower effect that draws the eye and creates visual interest. Surround the base with fresh flowers in white and green, or scatter shamrock confetti for extra festive detail.
Place Card Holders: Write each guest’s name on the cookie brim with edible marker or a small card tucked beneath each hat. They serve as both place cards and dessert—a clever dual-purpose decoration that guests love.
Why These Are the Perfect St Patrick’s Day Treats for Any Celebration
Among all the St Patrick’s Day treats you could make, these Leprechaun Hat S’mores occupy a special place because they check every single box.
They’re visually stunning in a way that requires minimal skill. They’re fun to make, which matters when you’re crafting with children or looking for an engaging group activity. They taste delicious because they’re built on the foundation of a beloved classic—the s’more—that has proven its appeal across generations.
They’re accessible from a dietary perspective too. With simple substitutions—gluten-free cookies, vegan marshmallows, dairy-free chocolate—these treats can accommodate a wide range of dietary needs without losing their essential charm or flavor.
Most importantly, they bring joy. When you set out a platter of tiny leprechaun hats at a party, you’ll see faces light up. You’ll hear laughter. You’ll watch people reach for their phones to take pictures. That’s the power of a truly great festive treat—it creates moments, memories, and genuine delight.
Make St Patrick’s Day Magical With These Leprechaun Hats
Whether you’re celebrating with a classroom full of children, hosting a family dinner, or just looking for a fun weekend activity, these Leprechaun Hat S’mores deliver on every level.
They prove that you don’t need complicated techniques or expensive ingredients to create something special. Sometimes the best treats are the ones that combine simple components in creative, unexpected ways.
So grab your marshmallows, melt that green chocolate, and get ready to create a batch of the most adorable St Patrick’s Day treats your celebration has ever seen. Your leprechaun hats are waiting, and trust me—they’re going to steal the show.
Leprechaun Hat S’mores
Equipment
- microwave-safe bowl
- parchment paper
- baking sheet
- toothpicks or lollipop sticks
Ingredients
- 18 large marshmallows
- 18 Fudge Stripe cookies
- 12 oz green chocolate melting wafers
- 4 oz yellow fondant or yellow fruit leather
- black edible marker or black decorating gel
- green sanding sugar (optional)
Instructions
- Line a baking sheet with parchment paper. Arrange cookies fudge-side down, spaced evenly.
- Melt green chocolate wafers in 30-second microwave intervals, stirring between each, until smooth.
- Insert a toothpick halfway into each marshmallow for dipping.
- Dip each marshmallow fully into melted chocolate. Let excess drip off, then place onto the center of a cookie base.
- Sprinkle with green sanding sugar while chocolate is still wet, if using. Let set at room temperature 15–20 minutes.
- Roll out yellow fondant and cut strips to wrap around the base of each marshmallow. Secure ends with a dab of melted chocolate.
- Cut small buckle squares from fondant and attach to front of band. Draw buckle detail with black edible marker or gel.
- Allow decorations to set completely before removing toothpicks and serving.