
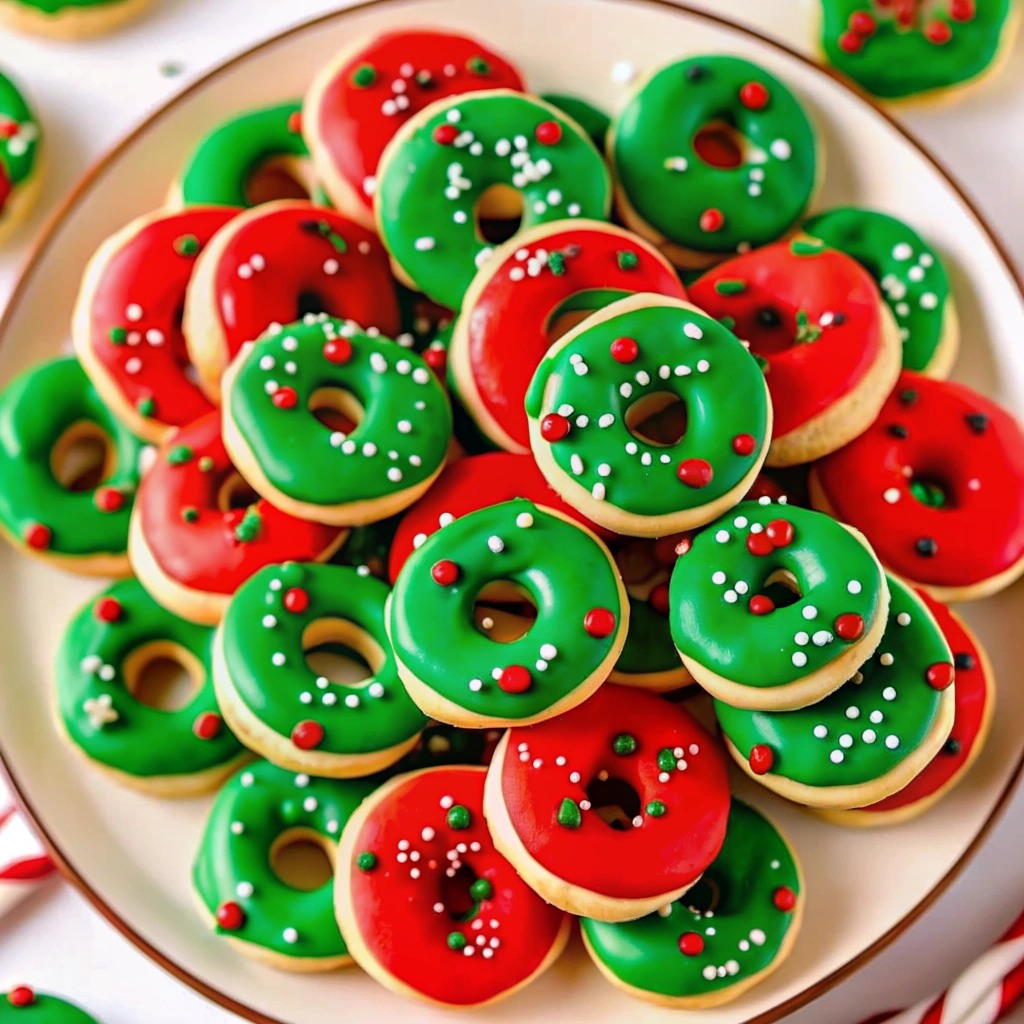
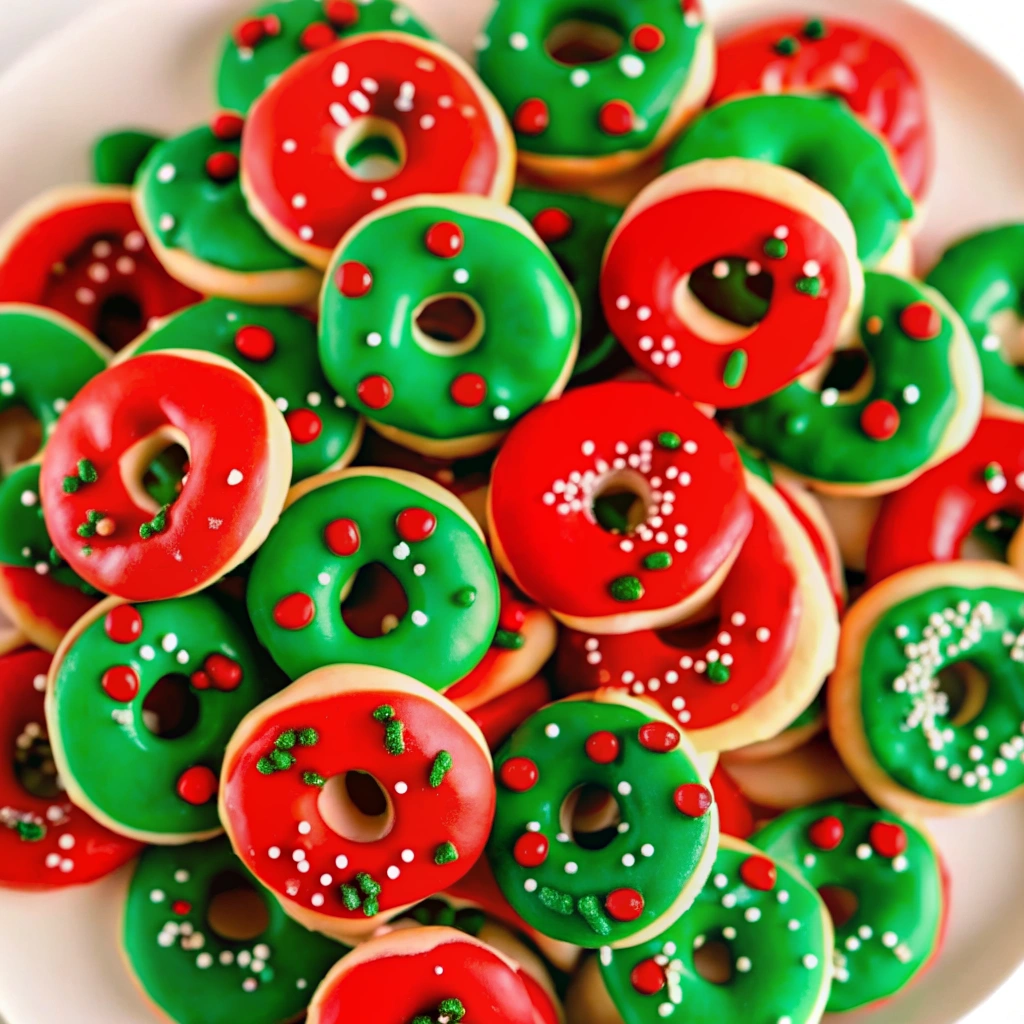
The best kind of holiday treat is one that makes people smile the moment they see it. And this year, we’re fusing two beloved desserts into one adorable, festive package: the Christmas Donut Cookies! Imagine a soft, sweet vanilla sugar cookie, perfectly shaped like a mini donut, then topped with vibrant red and green icing and a sprinkle of holiday cheer.
This is the perfect project for those seeking Christmas cookies recipes that are a little more creative than the standard cut-out, but still simple enough for a beginner decorator. The secret lies in a no-fuss sugar cookie dough that uses melted butter and oil for a wonderfully soft texture, which is then easily rolled and shaped into mini circles. If you’re looking for a dessert that delivers a major “wow” factor for gifting, a cookie exchange, or simply to delight Santa, this is your recipe. Let’s make the cutest cookies of the season!
Why Donut Cookies are a Holiday Decorating Delight
This novel approach to holiday baking stands out in the crowded field of Christmas cookies recipes due to its ease of shaping and high visual reward.
- Unique Visual Appeal: The classic donut shape—the circle with a hole—is instantly recognizable and charming. It’s an unexpected shape for a cookie, which makes it incredibly appealing and highly sharable.
- Beginner-Friendly Decorating: Unlike intricate royal icing designs, the icing method here is simple dipping and spreading. The hole in the middle acts as a natural border, making it easy to keep the icing looking neat and professional. Even beginners can achieve beautiful results quickly.
- The Soft Base: We utilize a sugar cookie base that is designed to stay soft and chewy. Using a combination of vegetable oil and melted butter in the dough helps lock in moisture, ensuring the cookie remains tender, rather than turning into a brittle disc.
- A Fun Project: Shaping the dough into ropes and circles is a fun, hands-on step that kids love. This Christmas donut cookies recipe easy method is perfect for getting the whole family involved in holiday baking.
The Anatomy of a Perfect Donut Cookie
To create a cookie that maintains its circular shape without spreading too much and boasts a vibrant, glossy glaze, these details are key.
1. The Dough: Softness and Shape Retention
- The Melted Fat Trick: Using melted butter and vegetable oil is unusual for a cut-out cookie, but here, it serves to create a dense, rich, and incredibly soft crumb texture. The dough must be chilled for at least an hour to firm up the fats enough to handle.
- No Leavening Overload: The dough uses a balanced amount of baking powder to ensure the cookies puff slightly without becoming overly cakey or expanding so much that they lose the hole in the center.
2. Shaping: The Simple Loop
- Uniform Ropes: Scoop 1 tablespoon of dough and roll it into a rope approximately 4 inches long and 1/2 inch thick. Uniformity ensures even baking time.
- The Gentle Push: Gently connect the two ends of the rope with a gentle push. Don’t worry about making the hole look perfect; the dough will expand slightly during baking, which will clean up the edges of the circle.
3. The Glaze: Glossy and Fast-Setting
- The Corn Syrup Secret: The addition of light corn syrup to the confectioners’ sugar and milk is crucial. It adds a beautiful glossy shine to the icing and helps it set quickly and smoothly, giving the cookies a true “glazed donut” finish.
- Vibrant Color: Divide the icing and use high-quality gel food coloring to create distinct bowls of red and green. This allows you to mix and match the colors on your cookie platter.
Step-by-Step: Shaping and Glazing Your Donut Cookies
This simple, straightforward method is perfect for a stress-free holiday baking session.
- Prep Time: 20 Minutes
- Chilling Time: 1 Hour (minimum)
- Cook Time: 16-18 Minutes
- Yields: Approximately 36 Cookies
Part 1: Making and Chilling the Dough
- Mix Wet Ingredients: In a large bowl, mix together the vegetable oil, melted butter, eggs, vanilla extract, salt, baking powder, and confectioners’ sugar until the mixture is creamy and smooth.
- Add Flour: Add the all-purpose flour and continue mixing until the dough is smooth and cohesive.
- Chill: Cover the bowl with plastic wrap and refrigerate for at least 1 hour (or overnight). This firming process is mandatory for shaping!
Part 2: Shaping and Baking
- Preheat and Line: Preheat your oven to 350°F (175°C). Line baking sheets with parchment paper.
- Roll and Shape: Remove the dough from the refrigerator. Scoop 1 tablespoon of dough and roll it into a rope about 4 inches long and 1/2 inch in diameter. Shape the dough into a circle, connecting the two ends with a gentle push, ensuring a small hole remains in the middle.
- Bake: Place the cookies on the baking sheets, about 1 inch apart. Bake for 16-18 minutes, or until the tops are set and the edges turn a light golden color.
- Cool: Remove from the oven and allow the cookies to cool completely on a wire rack before icing.
Part 3: Icing and Decoration
- Mix Glaze: In separate small bowls (one for red, one for green), mix 1/2 cup of confectioners’ sugar, 1 tablespoon of milk, and 2 teaspoons of light corn syrup until a smooth, spreadable icing forms. Adjust consistency with tiny drops of milk if too thick. Add food coloring to achieve desired festive shades.
- Icing Method: Dip the top of each cooled cookie into the icing, or use the back of a small spoon to gently spread the icing over the top.
- Sprinkle Immediately: While the icing is wet, immediately add festive sprinkles on top.
- Harden: Allow the icing to fully harden (this takes a few minutes thanks to the corn syrup) before storing the cookies in an airtight container.
Pro-Tips and Variations for a Perfect Donut Cookie
Ensure your Christmas donut cookies recipe easy is a flawless success with these tips for handling the dough and maximizing the fun.
- Fixing the Hole: If the hole closes up during baking, immediately upon removing the cookies from the oven, use the tip of a wooden skewer or chopstick to gently poke and reshape the hole while the cookie is still hot and soft.
- Flavor Swap: Substitute the vanilla extract with almond extract or peppermint extract for a fun variation.
- Cocoa Dough: Divide the dough in half. Add 1 tablespoon of unsweetened cocoa powder to one half to create chocolate donut cookies for a darker, more complex base.
- Best Chilling: If you skip the initial dough chill, your cookies will likely spread and lose the defined hole. If you roll them out and they still seem too soft, put the whole baking sheet in the freezer for 10 minutes before baking!
Storage and Gifting Excellence
These cookies are sturdy and cute, making them ideal for all your holiday sharing needs.
- Storing Baked Cookies: Once the icing is completely hard, store the cookies in an airtight container at room temperature for up to 1 week.
- Gifting: The donut shape makes these perfect for stacking! Layer them in a decorative tin, or place them individually in small cellophane bags tied with twine for a festive, professional-looking gift.
- Freezing Dough: The raw dough can be wrapped tightly and frozen for up to 3 months. Thaw overnight in the fridge, then proceed with rolling and shaping.
Conclusion: A Festive Crossover Hit
This Christmas Donut Cookies recipe is a triumphant, fun take on classic holiday baking. It offers the satisfying chew of a sugar cookie with the charming appearance of a mini donut, all finished with a vibrant, glossy glaze. By embracing this simple shaping technique, you’ll be able to create a unique and delightful treat that will steal the show on your cookie platter and become a cherished new tradition.

Cutest Christmas Donut Cookies
Equipment
- mixing bowls
- measuring cups and spoons
- baking sheets
- parchment paper
- cookie scoop
- wire cooling rack
Ingredients
- 1/2 cup vegetable oil
- 1/2 cup unsalted butter, melted and cooled
- 1 large egg
- 1 tablespoon vanilla extract
- 1/2 teaspoon salt
- 2 teaspoons baking powder
- 1 cup confectioners’ sugar
- 2 1/2 cups all-purpose flour
- 1/2 cup confectioners’ sugar (per color bowl)
- 1 tablespoon milk (per color bowl)
- 2 teaspoons light corn syrup (per color bowl)
- as needed red and green gel food coloring
- as needed holiday sprinkles
Instructions
- In a large bowl, mix together the vegetable oil, melted butter, egg, vanilla extract, salt, baking powder, and confectioners’ sugar until smooth and creamy.
- Mix in the all-purpose flour until a soft, cohesive dough forms.
- Cover the bowl and refrigerate for at least 1 hour (or overnight). This step is essential for preventing spreading.
- Preheat your oven to 350°F (175°C). Line baking sheets with parchment paper.
- Scoop 1 tablespoon of dough, roll into a 4-inch rope about 1/2 inch thick, then connect the ends to form a circle. Leave a hole in the center.
- Place cookies 1 inch apart and bake for 16–18 minutes, or until set and lightly golden around the edges. Cool completely on a wire rack.
- In two small bowls, combine 1/2 cup confectioners’ sugar, 1 tablespoon milk, and 2 teaspoons light corn syrup each. Mix until smooth. Tint one bowl red and one green.
- Dip or spoon the glaze onto the tops of the cooled cookies. Add sprinkles immediately before the icing sets.
Notes
• If the hole closes while baking, gently reopen it using a skewer right out of the oven.
• Chill the dough thoroughly for clean shapes that don’t spread.
• Swap vanilla for almond or peppermint extract for a new flavor twist.
• Divide dough and add 1 tbsp cocoa powder to half for chocolate donut cookies. Storage:
Store in an airtight container for up to 1 week.
Freezing: Freeze raw dough up to 3 months; thaw in fridge before shaping.