
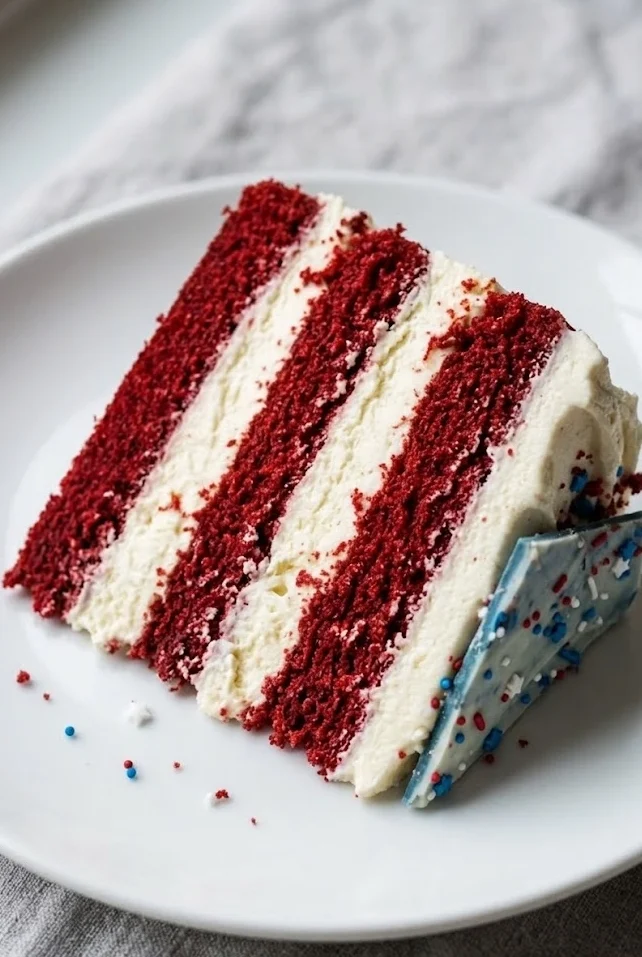
Some 4th of July food desserts are fun. Some are easy. And then there’s this — a three-layer Red Velvet Cheesecake Cake that is genuinely spectacular in every sense of the word. Moist, tender red velvet cake layers filled with a light, pillowy whipped cheesecake filling, finished with a shattered blue white chocolate bark and a scatter of patriotic sprinkles on top. It’s bold, beautiful, and built for a celebration.
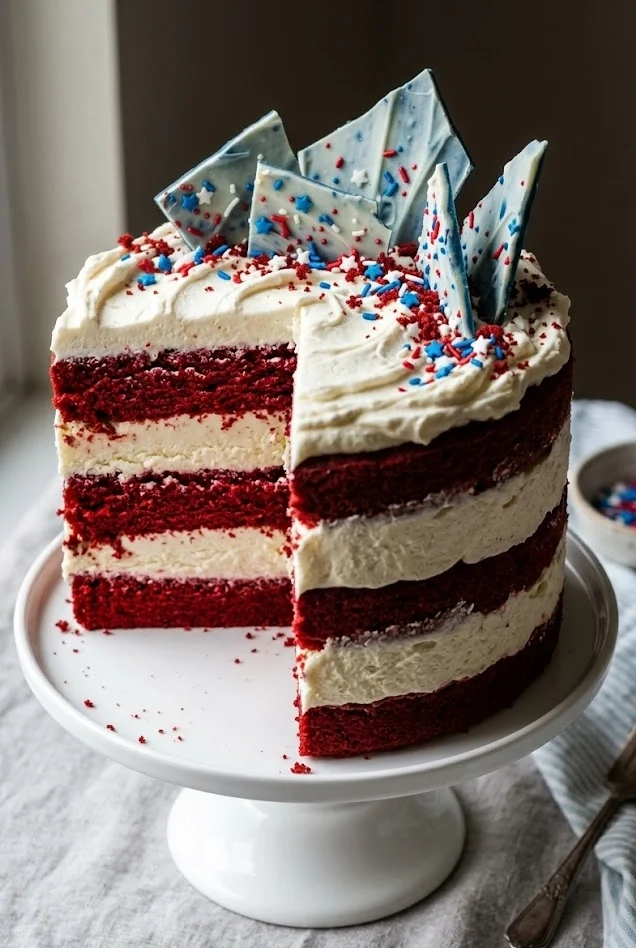
This is the centerpiece 4th of July food dessert — the one that earns a genuine gasp when it’s carried to the table and an immediate reach for forks before anyone has even found a plate. It takes a little more effort than a no-bake dessert, but the result is something your guests will talk about long after the fireworks are done.
Why You’ll Love This Red Velvet Cheesecake Cake
This cake solves one of the most common complaints about red velvet cake — that the traditional cream cheese frosting is too rich and heavy between thick cake layers. Here, the cream cheese filling is whipped together with lightly whipped heavy cream, creating a filling that’s fluffy, airy, and light enough that the whole cake still feels elegant and balanced rather than dense.
It’s one of the most visually dramatic 4th of July food dessert ideas because the deep crimson cake layers against the white cheesecake filling are naturally patriotic the moment you cut into it. Add the blue white chocolate bark garnish on top and the full red, white, and blue effect is complete without a single drop of food coloring on the outside.
The whipped cheesecake filling is also completely no-bake and comes together in under 10 minutes. The most time-intensive part is baking and cooling the cake layers — and even that is completely make-ahead friendly.
Common Mistakes When Making Red Velvet Cheesecake Cake (And How to Avoid Them)
Using cold ingredients. This is the most important rule in the entire recipe. All the cake ingredients — eggs, buttermilk, and oil — must be at room temperature before you begin. Cold ingredients don’t emulsify properly and can cause the batter to split, resulting in a dense, uneven cake. The cream cheese for the filling also must be fully softened before whipping, or you’ll end up with lumpy filling no matter how long you beat it.
Over-whipping the cream. The heavy whipping cream for the cheesecake filling needs to be whipped to soft, pillowy peaks — not stiff peaks. If you over-whip, the cream becomes grainy and buttery when folded into the cream cheese mixture. Stop whipping the moment the cream holds a gentle shape and no more liquid remains in the bowl.
Skipping the refrigeration step. The whipped cheesecake filling, while stable, is softer in nature than buttercream. After assembling the cake, it must be refrigerated thoroughly — ideally overnight — before slicing and serving. This firms up the filling, helps the layers set cleanly, and makes every slice look as beautiful as the whole cake. Always wrap the assembled cake tightly in plastic wrap before refrigerating to keep the crumb moist.
Key Ingredients for Red Velvet Cheesecake Cake
Cake flour is non-negotiable for the signature red velvet texture. Cake flour has a lower protein content than all-purpose flour, which produces the fine, tender, melt-in-your-mouth crumb that makes red velvet so distinctive. Do not substitute all-purpose flour — the final texture will be noticeably heavier and coarser.
Cocoa powder adds the subtle chocolate undertone that gives red velvet its unique flavor identity. It’s a small amount — just 1½ tablespoons — because this recipe prioritizes the bold red color and lets the tangy buttermilk and vanilla flavors shine through alongside the cocoa rather than overpowering them.
Red gel food coloring is what gives this 4th of July food dessert its spectacular crimson color. Gel coloring is far more concentrated than liquid — just 2 teaspoons delivers a deeply vibrant, saturated red throughout all three cake layers. If you want to amplify the patriotic effect even further, add an extra drop or two for an even bolder hue.
Buttermilk is the secret to the moist, tender crumb that makes red velvet cake so special. It reacts with the baking soda and vinegar to create a slight tang and an incredibly soft texture. Always use full-fat buttermilk at room temperature for the best result — never skip this ingredient or substitute with regular milk.
Heavy whipping cream is the key to the filling’s signature lightness. It must be ice cold before whipping — chill both the bowl and the cream itself in the freezer for 10 minutes before you begin. Cold cream whips faster and more stably, giving you that soft, pillowy cloud texture that makes this filling so different from a standard cream cheese frosting.
Cream cheese provides the filling’s structure, flavor, and that signature cheesecake tang. Use full-fat block cream cheese — not spreadable cream cheese from a tub — and make absolutely sure it’s at room temperature before beating. Room temperature cream cheese whips smooth and lump-free; cold cream cheese will stay lumpy no matter how long you beat it.
How to Make 4th of July Red Velvet Cheesecake Cake
- Heat oven to 350°F. Generously butter three 7-inch round cake pans, dust with flour, and line the bottoms with parchment paper. Set aside.
- In a medium bowl, whisk together 3¾ cups cake flour, 1½ teaspoons salt, and 1½ tablespoons cocoa powder. Set aside.
- In the bowl of a stand mixer fitted with the paddle attachment, beat 2¼ cups sugar and 2¼ cups canola oil on medium speed until well combined.
- Add 3 large eggs one at a time, beating well after each addition.
- Add 2 teaspoons red gel food coloring and 2 teaspoons vanilla extract. Beat until fully incorporated and the batter is a rich, vibrant red.
- Add the flour mixture in three additions, alternating with 1½ cups room temperature buttermilk, beginning and ending with the flour. Scrape down the sides of the bowl as needed.
- In a small bowl, stir together 2¼ teaspoons baking soda and 3 teaspoons white vinegar until combined. Add to the batter and beat for 10 seconds.
- Divide the batter evenly between the three prepared cake pans. Bake for 25–30 minutes until a cake tester inserted in the center of each layer comes out clean.
- Cool completely on wire racks before assembling — do not rush this step.
- For the whipped cheesecake filling: in a chilled bowl using the whisk attachment, whip 1½ cups cold heavy whipping cream to soft, pillowy peaks. Set aside.
- In a separate bowl with the paddle attachment, beat 12 ounces room temperature cream cheese with ¾ cup sugar and ½ tablespoon vanilla until completely smooth and creamy, with no gritty sugar remaining.
- Add the whipped cream to the cream cheese mixture and fold together gently by hand with a spatula until completely combined and light.
- To assemble, trim any domed tops from the cake layers with a serrated knife. Place the first layer on a cake board and pipe or spread a generous layer of cheesecake filling on top. Repeat with the second layer. Place the third layer on top.
- Spread the remaining cheesecake filling over the top and fill in any gaps between the layers on the outside. Smooth with an offset spatula.
- For the blue white chocolate garnish, melt ½ cup white chocolate, stir in 3 drops of blue gel food coloring, and spread onto parchment about ¼ inch thick. Scatter patriotic sprinkles over the top. Refrigerate for 4 minutes until set, then break into shards and arrange decoratively on top of the cake.
- Wrap the assembled cake tightly in plastic wrap and refrigerate for at least 4 hours — preferably overnight — before serving.
Variations & Tips for the Best Red Velvet Cheesecake Cake
Simpler garnish option. If the white chocolate bark feels like a step too far, simply crumble the trimmed red velvet cake scraps over the top of the filled cake. The red crumb against the white cheesecake filling looks beautiful in its own way and takes about 30 seconds to do.
Make it ahead. This cake is an ideal make-ahead 4th of July food dessert. Bake the cake layers up to two days in advance, wrap them tightly in plastic wrap, and store at room temperature. Make the filling and assemble the day before your party, then refrigerate overnight. Day-of, simply garnish and serve.
Make it a trifle instead. Cut the baked red velvet layers into cubes and layer them in a large clear trifle bowl with the whipped cheesecake filling and fresh blueberries. The red, white, and blue layers visible through the glass create a stunning patriotic effect with a fraction of the assembly effort.
Soft filling fix. If the whipped cheesecake filling starts to soften too much during assembly — particularly in a warm kitchen — refrigerate the filling bowl for 15 minutes, give it a gentle stir, and continue. The filling will firm back up quickly and be easy to work with again.
Flavor variation. Add the zest of one lemon to the whipped cheesecake filling for a bright, citrusy note that lifts the richness of both the cream cheese and the red velvet beautifully. It’s a subtle addition that makes the whole cake taste noticeably fresher and more complex.
FAQs
Can I use a boxed red velvet cake mix for this recipe? Yes — a quality boxed red velvet mix works as a practical shortcut for the cake layers, especially if you’re short on time. Use the homemade whipped cheesecake filling from this recipe regardless, as it’s what makes this dessert truly special and completely different from a standard boxed cake outcome.
How far in advance can I make this red velvet cheesecake cake? The fully assembled and garnished cake can be made up to 2 days ahead. Keep it tightly covered in plastic wrap in the refrigerator. Add any fresh garnishes like sprinkles or decorative white chocolate bark the day of serving so they look their best.
Why is my cheesecake filling lumpy? Lumpy filling almost always means the cream cheese was too cold when you began beating it. The cream cheese must be genuinely room temperature — soft enough to dent easily with your finger — before it will beat smooth. If you notice lumps, let the cream cheese sit longer and re-beat before adding the whipped cream.
Can I make this cake in standard 8 or 9-inch pans instead of 7-inch? Yes, though the layers will be thinner and the overall cake less tall. Use two 8-inch or 9-inch pans instead of three and reduce the baking time slightly — start checking at 22 minutes. The flavor and filling remain identical; only the proportions and presentation change.
4th of July Red Velvet Cheesecake Cake
Equipment
- three 7-inch round cake pans
- stand mixer
- mixing bowls
- wire cooling racks
- Offset Spatula
Ingredients
- 3 3/4 cups cake flour
- 1 1/2 tsp salt
- 1 1/2 tbsp cocoa powder
- 2 1/4 cups granulated sugar
- 2 1/4 cups canola oil
- 3 large eggs
- 2 tsp red gel food coloring
- 2 tsp vanilla extract
- 1 1/2 cups buttermilk
- 2 1/4 tsp baking soda
- 3 tsp white vinegar
- 1 1/2 cups heavy whipping cream
- 12 oz cream cheese, softened
- 3/4 cup granulated sugar
- 1/2 tbsp vanilla extract
- 1/2 cup white chocolate
- 3 drops blue gel food coloring
- 2 tbsp patriotic sprinkles
Instructions
- Preheat the oven to 350°F. Butter three 7-inch cake pans, dust with flour, and line the bottoms with parchment paper.
- Whisk together the cake flour, salt, and cocoa powder in a medium bowl.
- Beat the sugar and canola oil together until well combined.
- Add the eggs one at a time, beating well after each addition.
- Add the red gel coloring and vanilla extract and mix until the batter is evenly colored.
- Add the flour mixture in three additions alternating with the buttermilk, beginning and ending with flour.
- Mix the baking soda and vinegar together and immediately add to the batter. Mix for 10 seconds.
- Divide batter evenly among prepared pans and bake for 25–30 minutes until a tester comes out clean.
- Cool the cakes completely on wire racks before assembling.
- Whip the cold heavy cream in a chilled bowl until soft peaks form. Set aside.
- Beat the softened cream cheese, sugar, and vanilla until smooth and creamy.
- Gently fold the whipped cream into the cream cheese mixture until fully combined.
- Trim domed cake tops if needed. Place one layer on a cake board and spread with cheesecake filling. Repeat with the second layer and top with the third layer.
- Spread the remaining cheesecake filling over the top and smooth around any exposed gaps.
- Melt the white chocolate, tint it blue, spread onto parchment, add patriotic sprinkles, chill until firm, then break into shards and decorate the top of the cake.
- Wrap the cake tightly and refrigerate for at least 4 hours or overnight before serving.