
Not every St. Patrick’s Day dessert needs to be a multi-layer showstopper. Some of the most beloved holiday baking is also the simplest — the kind that fills the kitchen with warmth and the smell of butter and vanilla, that comes together in a single bowl in under thirty minutes, and that disappears from the plate faster than you can photograph it. These Easy St. Patrick’s Day Cookies are exactly that dessert.
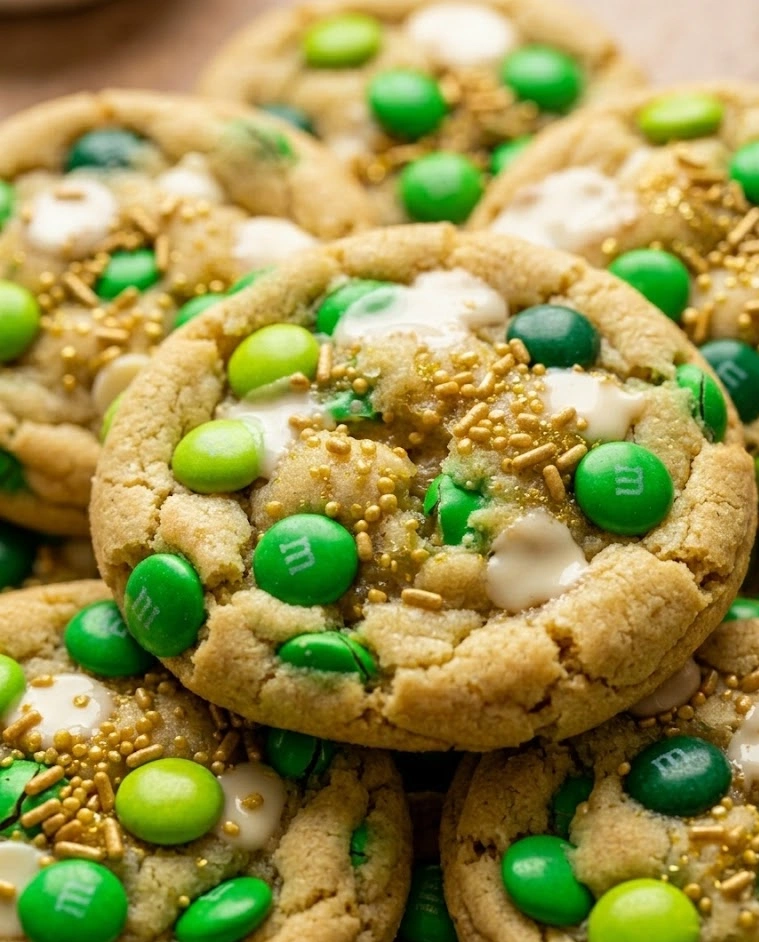
This is a soft, thick, chewy drop cookie built on a buttery brown sugar base — the same fundamental architecture as the best chocolate chip cookies, redirected entirely toward St. Patrick’s Day through green M&Ms, white chocolate chips, gold sprinkles, and a generous scatter of rainbow nonpareils that catch the light like tiny pieces of a holiday parade. No chilling time. No rolling pin. No cookie cutters. No specialized equipment of any kind. Just one bowl, a sheet pan, and thirty minutes from start to warm-cookie-in-hand.
The flavor logic here is intentional. Brown sugar produces a cookie with more moisture, more chew, and a deeper, almost caramel-like flavor than white sugar alone. The white chocolate chips provide creamy sweetness that complements rather than competes with the buttery base. The green M&Ms add a satisfying crunch and a pop of color that makes every single cookie look individually festive. This is the St. Patrick’s Day dessert that works for every baker at every skill level — and tastes like someone who really knows what they’re doing made it regardless.
If you love decorated cookies, you are going to want to bookmark this collection. We rounded up 20 of our best custom decorated cookie recipes — from easy patriotic 3-ingredient sugar cookies and red white and blue M&M cookies for the 4th of July, to shamrock cookie cups, matcha butter cookies, and decorated basketball treats for game day. Every recipe on the list is beginner-friendly, festive, and made to impress.
Why You’ll Love This St. Patrick’s Day Dessert
The first reason is the genuine simplicity. This recipe requires no mixer if you don’t have one — a bowl, a whisk, and a spatula are sufficient. The dough comes together in about five minutes of active work and goes directly onto the baking sheet with no chilling, no resting, and no intermediate steps. For a St. Patrick’s Day dessert that needs to happen on a weeknight or on the morning of the celebration itself, this speed is everything.
The second reason is the universal appeal. These cookies hit the flavor notes — buttery, chewy, sweet, a little caramel-like from the brown sugar — that make people reach for a second one before they’ve finished the first. There is no challenging flavor combination here, no ingredient that divides a room. This is crowd-pleasing baking in its purest form, made festive by color and occasion rather than complexity.
The third reason is how well they suit every context this holiday creates. A classroom St. Patrick’s Day party. A work desk covered in green decorations. A tray brought to a neighbor. A bake sale table. A last-minute contribution to a potluck. These cookies are perfectly sized, perfectly portable, and perfectly festive — the St. Patrick’s Day dessert that fits every situation without modification.
Common Mistakes — And How to Avoid Them
Mistake 1: Using Melted Butter That Is Too Hot
The temperature of the butter is the most critical variable in a drop cookie made with melted butter. If the butter is poured into the sugar while it is still steaming hot, it begins to melt and dissolve the sugar crystals rather than simply combining with them — producing a dough that spreads aggressively in the oven and results in flat, greasy cookies rather than the thick, chewy rounds this recipe aims for. Melt the butter and then allow it to cool for 5–8 minutes until it is fluid but comfortable to the touch before it goes anywhere near the sugar or eggs.
Mistake 2: Overmixing After the Flour Goes In
This is the same principle at work in the Green Velvet Brownies, the Mint Oreo Brownies, and every other baked good in this collection — gluten development is the enemy of tenderness. Once the flour enters the bowl, fold it in with a spatula using minimum strokes. A few unincorporated flour streaks are preferable to an overmixed dough that produces tough, dense cookies. Stop folding the moment the dough looks cohesive.
Mistake 3: Baking Until the Cookies Look Done
This is the counterintuitive truth at the heart of every great soft, chewy cookie: they should look underdone when they come out of the oven. The edges should be set and very lightly golden. The centers should look soft, puffy, and slightly underbaked — almost like they need another minute. They do not. They will continue cooking on the hot pan for several minutes after leaving the oven, and what looks raw at minute eleven will look perfectly set at minute fifteen. Pull them early every time.
Mistake 4: Skipping the Pan Bang
The pan bang is a technique developed to deflate overly puffy cookies and encourage a chewier, crinkled, more interesting texture — simply lifting the baking sheet two or three inches off the oven rack and dropping it flat against the rack two or three times in the last two minutes of baking. The impact causes the puffy centers to collapse slightly, creating a denser, chewier result with more surface area for the slightly crispy edges that contrast so satisfyingly with the soft center. It is optional but genuinely worth doing.
Mistake 5: Adding the M&Ms All Into the Dough
If all the M&Ms go into the dough before baking, many of them end up hidden inside the cookie where they contribute texture but minimal visual impact. The technique that produces the most festive-looking, bakery-style cookies is to reserve about a third of the M&Ms and press them firmly onto the top of each dough ball immediately before baking. The visible, colorful M&Ms on the surface are what make these cookies look deliberately festive rather than accidentally green.
Chef’s Notes
The science of the chewy cookie is worth understanding because it is counterintuitive in several ways. Chewiness in a cookie comes from two primary sources: moisture retention and gluten structure. Brown sugar contains molasses, which is hygroscopic — meaning it attracts and holds onto water molecules from the environment. This is why brown sugar cookies stay softer and chewier for longer than white sugar cookies, which dry out more quickly. Using more brown sugar than white, or exclusively brown sugar, is the single most reliable lever for producing chewiness.
The second source of chewiness is a modest amount of gluten development — enough to create a slightly elastic, pull-apart texture, but not so much that the cookie becomes tough. This is why the folding technique after the flour addition is so important. A small amount of stirring after the flour goes in actually helps the chew. The problem begins when that stirring becomes excessive and the gluten network becomes too tight and structured.
The addition of one extra egg yolk — beyond the standard single whole egg — is a technique borrowed from professional bakeries that dramatically improves the texture of drop cookies. The extra yolk adds fat and emulsifiers without adding the extra white protein that would make the cookie puffier and less chewy. It is the smallest possible change with the most noticeable impact on the finished texture — the difference between a good cookie and one that makes people ask for the recipe.
One more note specific to St. Patrick’s Day: the choice of green M&Ms matters more than it might seem. Standard M&M bags contain a mix of colors — sort through a large bag and pull out the green ones specifically, or purchase the seasonal St. Patrick’s Day M&M bags that are all green and gold. The visual consistency of an entirely green-and-gold color scheme on the cookie surface is what makes these look like an intentional St. Patrick’s Day dessert rather than a regular cookie that happens to have some green in it.
Key Ingredients & Why They Matter
Unsalted Butter is the fat that gives these cookies their rich, creamy flavor and their characteristic spread. Melted butter — rather than creamed softened butter — produces a denser, chewier, more fudge-like cookie because it does not incorporate air during mixing the way creamed butter does. Unsalted gives you complete control over the salt level, which is more important in a simple butter cookie than in a recipe with more competing flavors.
Brown Sugar is the chewiness engine of this recipe. Its molasses content retains moisture throughout and after baking, keeping the cookies soft and chewy for days longer than white sugar alone would allow. Dark brown sugar has more molasses and produces a deeper, more intense caramel flavor. Light brown sugar produces a subtler result. Both work — the choice is a matter of how pronounced you want that caramel-like depth to be.
Granulated White Sugar works alongside the brown sugar to encourage the slight crispy edge that contrasts so satisfyingly with the chewy center. The two-sugar combination is the standard professional approach to drop cookies — brown for moisture and chew, white for spread and edge crispness.
One Whole Egg Plus One Extra Yolk is the egg formula that professional bakeries use for maximum chewiness. The whole egg provides structure and moisture. The extra yolk adds fat and richness that keeps the crumb tender and the texture plush without adding the puffiness that an additional whole egg would create.
Pure Vanilla Extract is the aromatic backbone of the entire cookie. In a recipe this simple — where butter, sugar, and flour are the primary characters — the quality of the vanilla is fully perceptible. Use pure extract. The difference between pure vanilla and imitation in a butter sugar cookie is one of the most noticeable quality differences in all of home baking.
All-Purpose Flour provides the structure that holds the cookie together. Kept at a modest quantity relative to the fat content, it allows the butter and sugar to dominate the texture — producing a cookie that is more fudgy and soft than bready or cakey. The protein in the flour also contributes a small amount of gluten structure that is responsible for the slight chew.
Cornstarch is the secret ingredient in soft bakery-style cookies that most home recipes omit. A small amount — just a teaspoon or two — interferes with gluten development and starch gelatinization simultaneously, producing a more tender, soft crumb that stays softer for longer than a cornstarch-free cookie. It is the ingredient that makes people say these taste like they came from a bakery.
Baking Soda provides a small amount of lift and encourages browning through its interaction with the acidic molasses in the brown sugar. It also contributes to the slightly crispy edges by promoting the Maillard reaction — the browning process that creates flavor as well as color at the cookie’s perimeter.
Green M&Ms are the primary festive visual element and provide a satisfying candy shell crunch against the soft cookie base. Their chocolate center adds flavor complexity — a mild chocolate note that complements the buttery, caramel-like cookie without overwhelming it. Use green-only M&Ms for a cohesive St. Patrick’s Day color scheme, supplemented with gold if available.
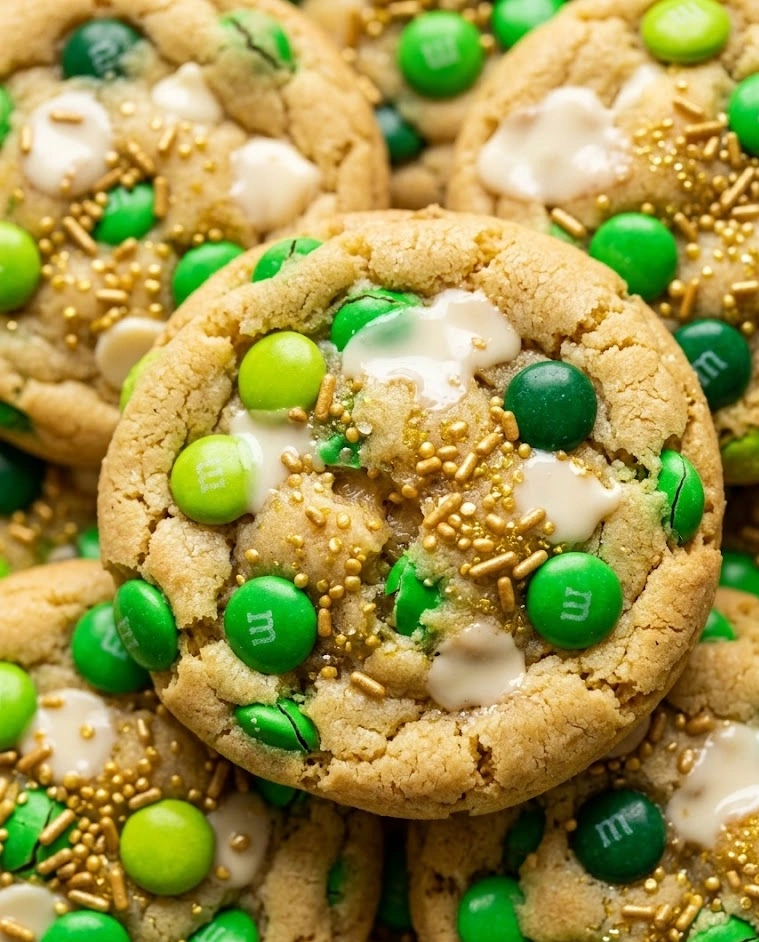
White Chocolate Chips provide creamy sweetness and a visual contrast against the green M&Ms. Their mild vanilla flavor echoes the extract in the base and adds a richness that makes the overall cookie taste more complex and layered than a standard sugar cookie. They also melt slightly at the edges during baking, creating small pools of creamy white chocolate that integrate into the surrounding dough.
Rainbow Sprinkles or Green Nonpareils are the finishing touch that makes these unmistakably festive. Pressed onto the surface of the dough balls before baking, they catch the light, add a subtle crunch, and signal immediately that this is a holiday cookie and not an everyday one.
How to Make Easy St. Patrick’s Day Cookies
Ingredients
For the Cookie Dough:
- ½ cup unsalted butter, melted and cooled 5–8 minutes
- ¾ cup light or dark brown sugar, packed
- ¼ cup granulated white sugar
- 1 large egg plus 1 egg yolk, room temperature
- 1½ tsp pure vanilla extract
- 1¾ cups all-purpose flour
- 2 tsp cornstarch
- ¾ tsp baking soda
- ½ tsp salt
Mix-Ins:
- ¾ cup green M&Ms, divided (reserve ¼ cup for topping)
- ½ cup white chocolate chips
- 2 tbsp green or rainbow sprinkles, plus more for topping
For Topping Each Dough Ball Before Baking:
- Reserved green M&Ms
- Extra white chocolate chips
- Green and gold sprinkles or shamrock sugar decorations
- Preheat the oven to 350°F. Line two baking sheets with parchment paper. Set aside. Do not use greased pans without parchment — the parchment is essential for even baking and clean removal.
- Melt and cool the butter. Melt the butter in a small saucepan or microwave. Allow it to cool for 5–8 minutes until fluid but no longer warm to the touch. This cooling step is non-negotiable — hot butter produces flat, greasy cookies.
- Combine the butter and sugars. In a large mixing bowl, whisk the cooled melted butter, brown sugar, and granulated sugar together vigorously for 60 full seconds. The mixture should look smooth, glossy, and slightly thickened — the sugars beginning to dissolve into the fat.
- Add the eggs and vanilla. Add the whole egg, extra yolk, and vanilla extract to the butter-sugar mixture. Whisk again for another 60 seconds until the mixture is pale, smooth, and ribbony — you should see it lighten slightly in color as the eggs fully emulsify into the fat. This whisking step matters for the texture of the finished cookie.
- Add the dry ingredients. In a separate bowl, whisk together the flour, cornstarch, baking soda, and salt. Add the dry ingredients to the wet ingredients all at once and fold with a spatula using slow, deliberate strokes — no more than 15 folds. Stop the moment the dough coheres and no large dry streaks remain.
- Fold in the mix-ins. Add the ½ cup of green M&Ms (reserving the remaining ¼ cup for topping), white chocolate chips, and 2 tablespoons of sprinkles to the dough. Fold in with 4–5 gentle strokes — just enough to distribute them evenly. Do not overfold.
- Portion the dough. Using a medium cookie scoop or two tablespoons, portion the dough into balls of roughly 2 tablespoons each. Roll lightly between your palms to smooth the surface slightly, then place on the prepared baking sheets with at least 2 inches between each — these cookies spread moderately.
- Top each dough ball. Press 3–4 of the reserved green M&Ms firmly into the top of each dough ball, along with a few extra white chocolate chips and a pinch of sprinkles or shamrock sugar decorations. The toppings pressed on before baking stay visible on the surface of the finished cookie rather than sinking inside — this is what produces the bakery-style festive appearance.
- Bake. Bake for 10–12 minutes, one sheet at a time, on the center rack. At 10 minutes, the edges should look set and very lightly golden — the centers will look underdone, soft, and slightly puffy. In the last 2 minutes of baking, perform the pan bang: lift the sheet 2–3 inches and drop it flat against the rack two or three times. Remove from the oven while the centers still look underdone.
- Cool on the pan. Allow the cookies to cool on the baking sheet for 8–10 full minutes before transferring to a wire rack. They will look too soft to move at the 5-minute mark — this is correct. The residual heat of the pan continues cooking the centers and setting the structure during this window. Moving them too early produces cookies that fall apart. Moving them at 8–10 minutes produces cookies with a perfect set, a chewy center, and a slightly crispy edge. Sprinkle with any additional decorations immediately after removing from the oven while the surface is still warm enough for them to adhere.
Variations & Tips
Make Them Mint Chocolate: Add ¼ teaspoon of pure peppermint extract to the dough alongside the vanilla and swap the white chocolate chips for dark chocolate chips. Replace the green M&Ms with Mint M&Ms if available, or use Andes mint pieces chopped into thirds. This version bridges the flavor world of these cookies with the Mint Oreo Brownies and the Baked Mint Chocolate Chip Doughnuts — a cohesive mint chocolate St. Patrick’s Day dessert table with one consistent flavor thread running through it.
Make Them Loaded: Add ¼ cup of crushed Golden Oreos, ¼ cup of green-tinted coconut flakes, and a handful of mini marshmallows to the mix-ins alongside the M&Ms and white chocolate chips. The result is a maximalist, loaded cookie that is genuinely over the top in the best possible way — the St. Patrick’s Day dessert equivalent of a parade float rather than a quiet celebration.
Make Them Sandwich Cookies: Bake smaller dough balls — about 1 tablespoon each — and sandwich pairs together with a generous dollop of green-tinted vanilla buttercream or cream cheese frosting. The frosting from the Green Velvet Brownies recipe works perfectly here and creates a cohesive St. Patrick’s Day dessert table if you are making both recipes simultaneously.
Make Them Gluten-Free: Replace the all-purpose flour with a quality 1:1 gluten-free baking flour blend and add an additional teaspoon of cornstarch. Let the dough rest for 10 minutes before portioning — gluten-free flour blends benefit from a short rest to fully hydrate, producing a more cohesive dough and a better-textured finished cookie.
Pro Tip — The Bakery Height Trick: For cookies with the tall, thick, bakery-style profile rather than flat rounds, chill the portioned dough balls for 20 minutes in the refrigerator before baking — even though the recipe does not require chilling. Cold dough spreads more slowly in the oven, giving the leavening more time to create lift before the fat melts and the cookie sets. The result is a noticeably taller, thicker cookie with a more dramatic appearance and a chewier, less crispy texture throughout.
How to Meal Prep Easy St. Patrick’s Day Cookies
Cookies are among the most naturally meal-prep-friendly St. Patrick’s Day desserts in the entire holiday baking canon — they bake quickly, store beautifully, and can be prepared at multiple stages in advance to distribute the work across several days.
Freeze the Dough Balls: Portion the dough into balls, top each one with M&Ms and sprinkles as directed, and freeze on a parchment-lined tray until solid — about 1 hour. Transfer to a zip-lock freezer bag and store for up to 3 months. Bake directly from frozen at 350°F for 13–15 minutes without thawing. This is the single most useful cookie meal-prep technique in existence — it means fresh-baked St. Patrick’s Day cookies are always 15 minutes away regardless of when the occasion arises.
Bake and Store: Fully baked cookies store in an airtight container at room temperature for up to 5 days. To maintain their soft, chewy texture, place a slice of sandwich bread in the container alongside the cookies — the bread donates its moisture to the cookies and keeps them from drying out, a technique that works reliably and indefinitely as long as the bread is replaced when it becomes stale.
Make for a Bake Sale or Classroom Party: This recipe doubles and triples effortlessly — the same single-bowl technique scales linearly with no adjustment to method or timing. A doubled batch produces approximately 40–48 cookies, which is enough for a large classroom party, a generous bake sale contribution, or a St. Patrick’s Day dessert table that feeds a serious crowd.
Gift Packaging: These cookies are ideal for St. Patrick’s Day gifting because they hold their appearance exceptionally well for several days. Stack 4–6 cookies, wrap in a cylinder of clear cellophane, tie with green and gold ribbon, and attach a small shamrock tag. The visible green M&Ms and gold sprinkles through the cellophane make the package look as festive as the cookies taste — a complete St. Patrick’s Day dessert gift that requires minimal additional effort beyond the baking itself.
Cultural Context: Cookies, Community, and the American Tradition of Holiday Baking
The drop cookie as a specific format — portioned by spoon directly onto a baking sheet, baked into irregular, generously sized rounds — is a distinctly American baking contribution to the world. Its origins trace to the practical baking culture of colonial and post-colonial America, where home ovens were unreliable, time was scarce, and a dessert that could be portioned and baked quickly without the labor of rolling, cutting, and decorating was enormously valued. The chocolate chip cookie — the drop cookie’s most famous descendant — was invented by Ruth Wakefield at the Toll House Inn in Massachusetts in the 1930s and went on to become arguably the most beloved and widely reproduced cookie recipe in the world.
The tradition of holiday-specific cookies — decorated, colored, and shaped to reflect the calendar occasion — developed gradually through the 20th century as food coloring became widely accessible, specialty baking supplies proliferated, and the American holiday calendar became increasingly associated with specific foods and aesthetics. Valentine’s Day earned its pink and red heart cookies. Christmas its red and green trees and stars. Halloween its orange and black. And St. Patrick’s Day earned its green — the same vivid, celebratory green that runs through the entire holiday’s visual identity.
What makes the St. Patrick’s Day cookie tradition particularly interesting is how it mirrors the holiday’s own evolution — from a solemn Irish religious feast day observed quietly in the home to an exuberant, community-centered American celebration conducted in classrooms, workplaces, parties, and public streets. The cookie, more than almost any other baked good, is a communal dessert — made to be shared, brought to gatherings, handed to children, left on desks. It is the St. Patrick’s Day dessert that participates most directly in the social fabric of how the holiday is actually celebrated.
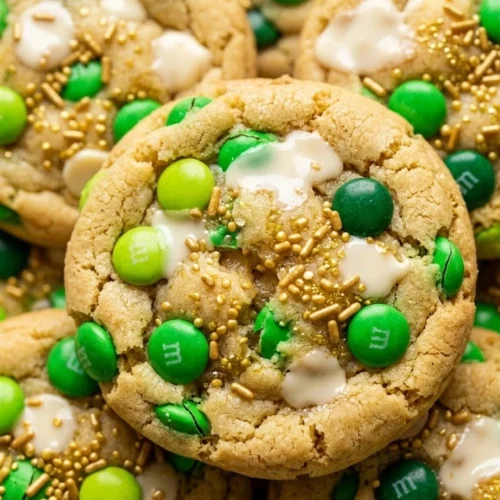
So when you pull these Easy St. Patrick’s Day Cookies off the baking sheet — green M&Ms gleaming, white chocolate chips half-melted into the soft dough, sprinkles catching the kitchen light — you are making something that connects directly to a long tradition of American holiday community baking. It requires thirty minutes, one bowl, and a genuine generosity of spirit — which, when you consider it, is really all the best St. Patrick’s Day desserts have ever asked for.
Easy St. Patrick’s Day Cookies
Equipment
- mixing bowl
- whisk
- spatula
- baking sheets
- parchment paper
Ingredients
- 1/2 cup unsalted butter, melted and cooled
- 3/4 cup brown sugar, packed
- 1/4 cup granulated sugar
- 1 large egg
- 1 egg yolk
- 1 1/2 tsp pure vanilla extract
- 1 3/4 cups all-purpose flour
- 2 tsp cornstarch
- 3/4 tsp baking soda
- 1/2 tsp salt
- 3/4 cup green M&Ms, divided
- 1/2 cup white chocolate chips
- 2 tbsp green or rainbow sprinkles, plus more for topping
Instructions
- Preheat oven to 350°F. Line baking sheets with parchment paper.
- Melt butter and allow to cool 5–8 minutes until no longer warm to the touch.
- Whisk cooled butter, brown sugar, and granulated sugar together until smooth and glossy.
- Add egg, egg yolk, and vanilla. Whisk until pale and slightly thickened.
- Whisk flour, cornstarch, baking soda, and salt together. Fold into wet ingredients just until combined.
- Fold in 1/2 cup of the green M&Ms, white chocolate chips, and sprinkles gently.
- Scoop dough into 2-tablespoon portions and place 2 inches apart on baking sheets.
- Press reserved M&Ms and extra white chocolate chips onto tops of dough balls.
- Bake 10–12 minutes until edges are set and centers look slightly underdone. Optional: gently bang pan during final 2 minutes for chewier texture.
- Cool on baking sheet 8–10 minutes before transferring to wire rack.