
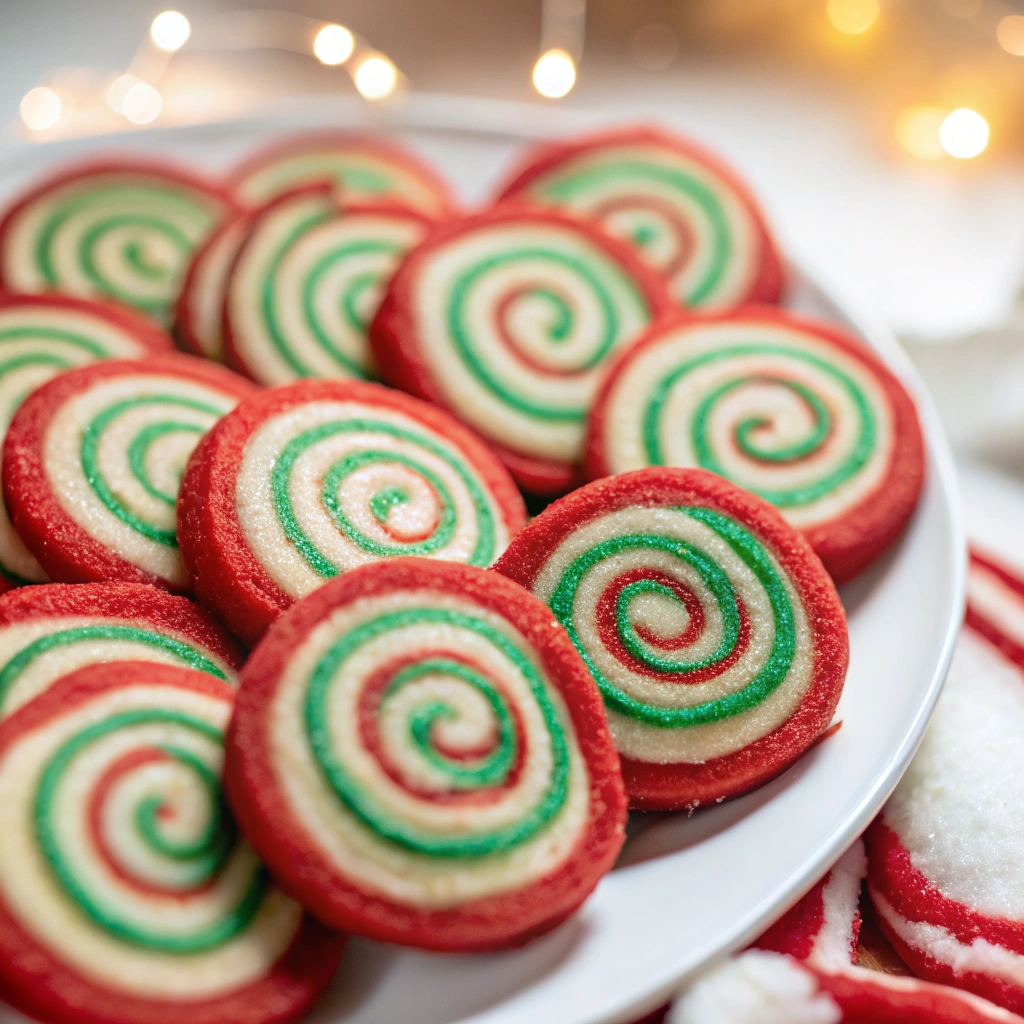
In the world of holiday sweets, some cookies are admired for their flavor, and others are famous for their festive visual appeal. The Christmas Pinwheel Cookies manage to do both! With their stunning, dizzying swirl of color—usually a festive red and pure white—they are guaranteed to be the most commented-upon item on any cookie platter or in any cookie swap box.
While the intricate look might suggest a complicated process, this Christmas pinwheel cookies recipe is remarkably straightforward, relying on the genius of the slice-and-bake method. It requires just one basic dough that is divided, colored, layered, rolled, and chilled. This technique makes them ideal for getting ahead on your holiday baking, as the logs can sit patiently in your freezer until you’re ready to slice and bake a fresh batch. Get ready to create a beautiful, edible work of art!
Why Pinwheels are the Ultimate Holiday Baking Project
For anyone looking for Christmas cookies recipes that offer a high “wow” factor with low active preparation time, the pinwheel is the perfect solution.
- Visual Impact: The beautiful, tightly wound swirl of color is inherently festive. We typically use red and white for a classic holiday look, which instantly elevates the look of your entire dessert table.
- The Slice-and-Bake Advantage: Once the dough is made and shaped into logs, the majority of the work is done. You can bake only what you need, minimizing last-minute kitchen chaos. This adaptability is the hallmark of great holiday baking.
- Freezer Superstar: The unbaked dough logs freeze perfectly for up to three months. This allows you to space out your baking, making your December much less stressful. Just slice the frozen dough and bake—no thawing needed!
- Textural Balance: The shortbread-style dough bakes into a crisp, buttery cookie that holds its shape beautifully, maintaining the clean lines of the swirl even after cooling.
The Anatomy of a Perfect Swirl
The secret to a stunning Christmas pinwheel cookies recipe lies in how you handle and combine the two different colors of dough.
The Dough: Uniform and Pliable
- The Softened Butter Rule: Unlike some recipes, this dough relies heavily on properly softened, unsalted butter.1 It should be pliable enough to cream with the sugar but still hold its shape—not melted or oily. This ensures the dough is easy to roll without cracking.
- The Division: The dough is mixed first as a single, uniform batch. Only after the initial mixing is complete do you divide the dough equally for flavoring and coloring. This ensures both layers have the exact same texture and baking properties.
- The Flour Measurement: As always, use the spoon and level method for flour. Dry dough will crack when you try to roll it into a log, ruining the perfect swirl.
Color and Flavor Combinations
- The Classic: Vanilla and Chocolate is the traditional choice. Use a good quality unsweetened cocoa powder for the dark layer.
- The Festive Swirl: For a vibrant Christmas pinwheel cookies recipe, we recommend Vanilla (white) and Peppermint (red). Add 1/2 teaspoon of peppermint extract to the red dough and use a quality gel food color (like Americolor or Wilton) to achieve a deep, rich red without altering the dough’s consistency.
- The Best Color: Avoid liquid food coloring. Gel food coloring provides intense color with only a tiny amount of liquid, which is critical for maintaining the correct dough texture.2
The Tight Roll: Preventing the Gap
- Rolling Thickness: Both sheets of dough must be rolled to the exact same dimensions and thickness—typically 1/8 to 1/4 inch thick rectangles. If one is thicker, the swirl will be uneven.
- The Initial Seal: After layering the dough, ensure you press the two sheets firmly together before rolling.
- Rolling Technique: Roll the dough tightly, like a sleeping bag, and pinch the final seam closed. The tighter the roll, the cleaner the swirl will look when sliced.
Step-by-Step: Creating the Swirl Magic
This method ensures you get the perfect colors, texture, and the all-important, tight swirl.
- Prep Time: 45 Minutes
- Chilling Time: 4+ Hours
- Cooking Time: 10-12 Minutes
- Yields: About 4-5 Dozen Cookies
Part 1: Making and Coloring the Dough
- Cream Butter and Sugar: In a large bowl, cream the softened butter and sugar until light and fluffy. Beat in the eggs, vanilla extract, and salt.
- Add Flour: Gradually mix in the flour until the dough is just combined. Do not overmix.
- Divide and Color: Divide the dough evenly in half. Leave one half as is (vanilla/white). To the second half, add your coloring (e.g., 1-2 teaspoons of cocoa powder for chocolate, or 1/2 teaspoon of red gel food color and peppermint extract for a festive swirl). Mix only until the color is uniform.
- Shape and Chill (Initial): Form each dough into a rough rectangle, wrap separately in plastic wrap, and chill for 30 minutes. This prevents the dough from sticking when you roll it.
Part 2: Rolling and Assembling the Pinwheels
- Roll the Dough: On a piece of lightly floured parchment paper, roll the vanilla dough into a rectangle roughly 12 x 10 inches and about 1/8 to 1/4 inch thick. Repeat with the colored dough, ensuring both rectangles are the same size.
- Layer: Carefully peel the top layer of parchment off the colored dough. Flip the colored dough onto the vanilla dough. Gently press them together across the whole surface.
- Roll Tightly: Starting with a long edge, begin to roll the dough up tightly, using the parchment paper to help guide the roll.3 Once rolled, pinch the seam shut.
- Final Shape: Wrap the log tightly in plastic wrap. Gently roll the log on the counter to ensure it is round and uniform.
Part 3: The Crucial Chill and Bake
- Chill (Crucial Step): Refrigerate the dough log for a minimum of 4 hours or up to 3 days. The dough must be very firm to slice cleanly and maintain the swirl shape.
- Slice: Preheat oven to 375°F (190°C). Using a sharp, thin knife, slice the cold dough log into rounds about 1/4 inch thick. Turn the log slightly as you slice if it flattens on one side.
- Bake: Place the slices onto a parchment-lined baking sheet, spacing them 1 inch apart. Bake for 10-12 minutes, or until the edges are lightly golden.
- Cool: Let the cookies cool on the baking sheet for 5 minutes before transferring them to a wire rack to cool completely.

Pro-Tips and Troubleshooting for Swirl Perfection
Ensure your Christmas pinwheel cookies recipe is flawless with these key solutions to common issues.
| Problem | Cause | Quick Fix |
| Dough Cracks When Rolling | Dough is too cold or dry (too much flour). | Let the dough sit at room temperature for 10-15 minutes to soften slightly. If too dry, spritz lightly with milk or water. |
| Swirl Spreads/Blobs Out | Dough was not chilled long enough OR oven temperature is too low. | Ensure the log is rock-hard when slicing. Place sliced cookies back in the freezer for 10 minutes before baking to firm up. |
| Log Flattens in the Fridge | Not wrapped tightly enough. | After wrapping in plastic, secure with a piece of cardboard or place inside a paper towel tube/Pringles can cut lengthwise while chilling to maintain a perfect circle. |
| Dough Layers Separate | Dough layers were not pressed together enough before rolling. | Next time, use a rolling pin over the layered sheets to ensure they adhere firmly. |
Freezing and Storage for Holiday Prep
The slice-and-bake method makes these pinwheels ideal for holiday baking in advance.
- Freezing Baked Cookies: Once cooled, store the cookies in an airtight container for up to 1 week at room temperature. They can be frozen for up to 3 months, thawed overnight, and still maintain their crisp texture.
- Freezing Dough Logs (Best Method): The unbaked, wrapped dough logs are the best way to freeze. Wrap the log first in plastic wrap, then aluminum foil or place it in a freezer bag. Freeze for up to 3 months.
- Baking from Frozen: When you’re ready to bake, remove the foil/bag, unwrap the plastic, and slice the frozen dough immediately (it’s actually easier to slice when frozen!). Add 2-3 minutes to the baking time.
Conclusion: A Festive Feast for the Eyes
The Christmas Pinwheel Cookies recipe is a festive classic that delivers big visual results for moderate effort. It’s a wonderful project for a snowy afternoon, teaching you a fantastic slice-and-bake skill that you can apply to any flavored cookie. By mastering the tight roll and the final chill, you’ll be able to create a beautiful, delicious, and perfectly swirled cookie every single time. Happy baking!

Perfect Christmas Pinwheel Cookies
Equipment
- mixing bowls
- electric mixer
- measuring cups and spoons
- parchment paper
- Rolling Pin
- Plastic Wrap
- sharp knife
- baking sheet
- wire cooling rack
Ingredients
- 3 cups all-purpose flour, spooned and leveled
- 1 teaspoon baking powder
- ½ teaspoon salt
- 1 cup unsalted butter, softened
- 1 cup granulated sugar
- 2 large eggs
- 2 teaspoons vanilla extract
- ½ teaspoon peppermint extract (for red dough)
- 1–2 teaspoons red gel food coloring
- optional 1–2 teaspoons unsweetened cocoa powder (for chocolate swirl variation)
Instructions
- In a large bowl, cream the softened butter and sugar together with an electric mixer until light and fluffy. Beat in eggs, vanilla extract, and salt until smooth.
- Gradually add flour and baking powder, mixing on low speed until a soft dough forms. Do not overmix.
- Divide the dough evenly in half. Leave one half plain (vanilla). To the second half, add peppermint extract and red gel food coloring. Mix just until color is uniform.
- Shape each dough into a flat rectangle, wrap in plastic wrap, and chill for 30 minutes to firm up slightly.
- On parchment paper, roll each dough into a rectangle about 12×10 inches and 1/8 to 1/4 inch thick. Remove the parchment from the red dough and carefully place it on top of the white dough. Press gently to adhere.
- Starting from a long edge, tightly roll the layered dough into a log, using the parchment to help lift and guide it. Pinch the seam to seal. Wrap the log tightly in plastic wrap and gently roll it to maintain a round shape.
- Refrigerate the wrapped log for at least 4 hours or up to 3 days, until very firm. This step is crucial for clean slicing.
- Preheat oven to 375°F (190°C). Line baking sheets with parchment paper. Slice chilled dough into 1/4-inch rounds using a sharp knife. Place 1 inch apart and bake for 10–12 minutes, until edges are just golden. Cool on baking sheet 5 minutes, then transfer to a rack to cool completely.
Notes
Freezing: Wrap unbaked dough logs in plastic wrap and foil; freeze for up to 3 months. Slice from frozen and bake, adding 2–3 minutes to the bake time.
Pro Tip: For perfect circles, store dough logs inside a paper towel tube or cardboard sleeve while chilling to prevent flattening.